Showing posts with label Technology. Show all posts

Wednesday, September 15, 2021

Kitty Paw toe bean macro pad

 I'm catching up on my tinkering projects.  The latest one: Kitty Toe Bean Keypad with Color TFT.  I forgot to take in-progress pictures but here's the final just before assembly shots.  I 3d printed the parts on my Prusa Mini and they came out excellent. Only some minor looseness in the snap-together parts.  The rest of the parts I ordered from Adafruit.com listed in the build guide. 


Pretty happy with how the qtPy soldering turned out


The Kahil Jade switch wiring isn't great, but it works - you have to solder to a pin/post which requires very steady hands to keep it smooth - I do not have steady hands.


Press fit together.  You can see some of my sloppy soldering on the TFT display.


With the Toe Beans installed.


Here's a video of it in action - the original build guild has a dancing parrot as the image, I swapped out pictures of my cat Lola.  Sorry about the vertical filming I wasn't paying attention. 


All in all a fun project - the buttons do CMD+S (save), CMD+X (cut), CMD+C (copy) and CMD+P (paste).  I'll have to open a thread in the adafruit forums as the overall performance is really slow.  I have to hold the button longer than I would expect for it to take the action.  In the video on the build guide you get the impression that it works much faster/smoother than that.  Probably a wiring issue on my part


Monday, July 19, 2021

printing with PETG in my Prusa Mini


So I bought a low-cost spool of OVERTURE 3D PETG from amazon - it was on sale for $21, so I went for it.  First off, Overture's packaging was good and came with a 20cm x 20cm build surface sticker.  It's too big for the mini, but might come in handy with my MonoPrice printer at the office.  It also came with an overture branded ruler/card type thing that's making a nice bookmark in my Foundation and Empire book.  Trying to read them before the series drops on AppleTV+, but I digress. 

My first print was a small tilt box I found on Thingverse.  It came out really well!


It also came off the bed with out any issue (more on that in a few).  

Next up I wanted to print some buckles that would work with some web strapping I have around the house from a previous halloween costume build.  There were a few out there, but this one on the Prusa Prints gallery was the one I went with.  I printed it twice, with supports both times.  Not sure if I needed them or not, but it looked like some of the spans might be too big to cover with out supports.  They came out great and work pretty well.  I left the straps extra long so I can tie a knot if the buckle fails on me just in case.


The only issue I had was taking the brim and support material off the standard prusa mini bed.  It was stuck on like superglue.  I almost scratched the bed trying to get the excess off.  It took some searching to figure out what was different.  In the tilt box case, I let it run over night and took it off the build plate the next morning.  With the buckles, I was printing them back to back and trying to remove them without letting everything become truly cold.  In the various forums I see all kinds of tips and tricks - glue stick, windex, other release agent kind of stuff.   Then I decided to see what the manual said.  Should have started there in hindsight. 

Heatbed: Various manufacturers suggest using various separation (or adhesive) layers for printing PETG, such as Kapton tape, glue stick, etc. Our print sheets work fine without these separation layers but it’s important to know a few basic rules. First, keep the print surface clean. When printing on a smooth sheet, use a window cleaner instead of isopropyl alcohol. Textured powder-coated sheets can be cleaned with IPA. Once you finish printing, let the print cool before you try to remove it from the sheet. 

And there it is. Let it cool completely before removing.  I will probably try using windex to clean the bed next time instead of the alcohol wipes, but other than that, patients will be my go-to move.

Monday, March 1, 2021

The foggy future of 2.4Ghz Wifi

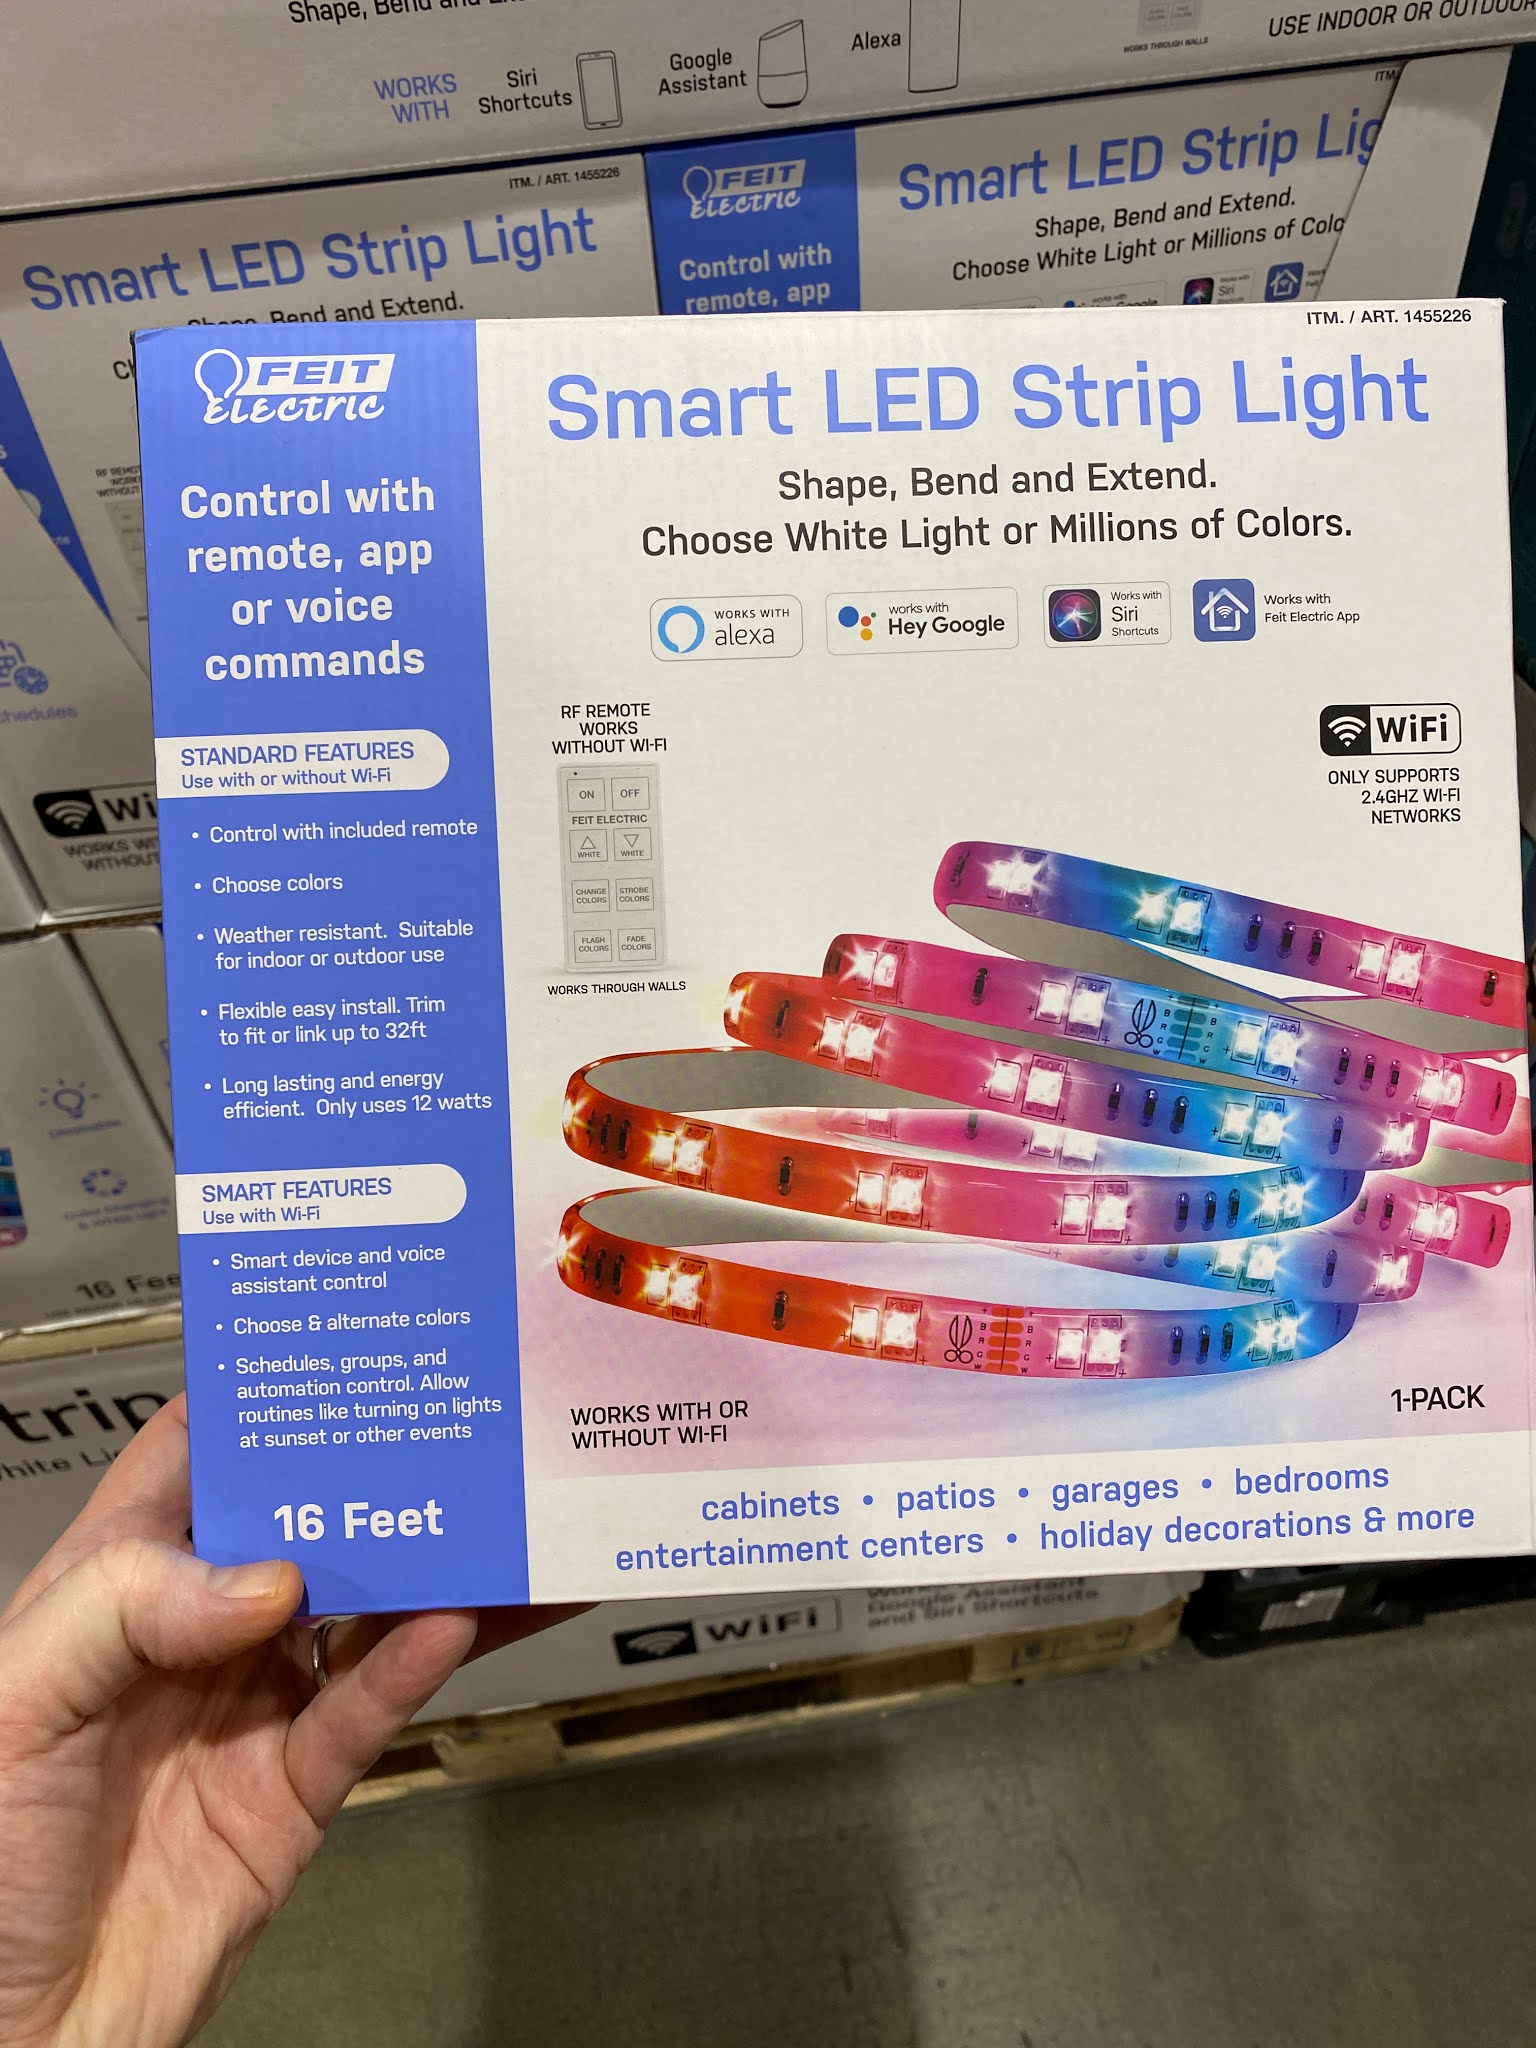
 Saw this packaging at Costco the other day:


The thing that caught my eye:


With the WIFI 5 standard being the 802.11ac spec, that's only 5Ghz and necessitates manufacturers include the wifi disclaimer on their packaging now.   Although the WIFI6 includes 2.4Ghz I'm not certain it will cover these older 802.11g spec devices.  It could be a confusing future for people and wifi.  I can foresee people getting their spiffy WIFI6 / 802.11ax networks online and getting blazing speeds to there phones, tablets and laptops only to find that their 10-year old doorbells, thermostats and smart fridge's can't connect.


Tuesday, February 16, 2021

The RP2040 is going to change things in the microcontroller space

This is a bit of a Captain Obvious statement, but the Raspberry Pi Foundation's RP2040 is going to shake up the microcontroller space.  I can't wait to play with this stuff.  For the most part I stay within the Adafruit ecosystem.  They are the "Easy Button"  of microcontrollers.  If you want to do stuff with out having an Electrical Engineering degree, Adafruit is hands down the way to go. They do so much documentation and easy to follow examples at learn.adafruit.com that you can self teach yourself how to work with microcontrollers. 

Picture of RP2040 Pico board
Raspberry Pi Pico - RP2040


The RP2040/Pico is the first time where I feel like I could sail beyond the safe harbor of Adafruit.  The open source and collaborative nature of the Pi foundation makes the information accessible and supported. Looking at the example projects on the Pi site for the pico you can quickly learn how to customize it to your own needs with ease.

Because of this open behavior of both Pi and AdaFruit you get some fantastic remixes and combinations of hardware.  This kind of low cost, easy access and modification of the platform lets creative people do new and interesting things.  Recently the FUZIX distribution was ported to the pico.  MicroPython and CircuitPython is already ported.  It won't be long and a simple and inexpensive wireless interface will be added to the mix and IOT will be in play.

Anyway I think over the next 2 years you're going to see more and more computing embedded into more devices.  A great example of how the future products can change.  The idea of a smart mirror started with people figuring out LCD monitors and Raspberry Pi's are cheap.  Initially they were hacked together by industrious individuals.  Then the open source projects to make it easier came along.  Today you can get a home gym with a built in smart mirror for workouts. The low cost of the Pi computer made that possible.  The Pico and RP2040 chip is going to do the same thing on a microcontroller level.  

Monday, July 15, 2019

EVO cars in Vancouver - why Vancouver is going to be the self-driving car mecca.

So I'm visiting my sister-in-law in Vancouver this week.   I love the city.  It has such a unique blend of urban and wilderness in such close proximity.  The downtown area and main street areas are simply fantastic. Then go 15 minutes and you're either in the mountains or in Stanley Park.

We're currently a two-car family.  It's a legacy from when we were both working full time.  Soon my oldest daughter will be driving so we've kept two cars going even though we could probably get by with a single car.  I ride my bike to work most days and could mass transit, Lyft or taxi on the other days.  The cars are both paid for so that's a factor too.   My sister-in-law's family is a single car family and EVO cars (and car2go as well) are a big reason why.  We have Car2Go where we live, but it's not as plentiful or convenient as it is in Vancouver.

Things that are fantastic about EVO to me:

  • All the cars are the same - They're all Toyota Prius models with a roof rack
  • It seats 4 people which is the biggest upside over the Smart cars from Car2go. 
  • There's hundreds of them - they're everywhere you are.
  • They're cheap - $0.41 a minute.
  • They make reporting issues/problems/gassing up simple 
  • They're allowed to park almost anywhere - residential permit-only parking is allowed as a for-instance. You don't have to return it anywhere in particular, you just park it and relinquish control.

It works for a lot of reasons, and some of them are unique to Vancouver.  Geography is one.  The source and destinations for the cars is all within a fairly constrained area so a lot of usage occurs within the zone of operation.  Between the water and the mountains there's a fairly constrained area that people would want to take the vehicles.  In DC where I live, the area is too spread out and sprawling for it to work well.  The local government and businesses committed to the idea.  They changed rules about parking for these vehicles and made other accommodations to make them affordable and convenient.  The local population also wanted it.  These unique constraints are what make it work here.  Not sure it would work the same anywhere else.  I'm sure there are other cities that could make it work, but not as well as it does here.

I think EVO is going to make Vancouver the self-driving car epicenter.  As the self driving technology advances, eventually the cars will be able to come to you, the same way a taxi/Lyft/Uber does today.  This will work in all cities that these services today, but Vancouver will be different and a step ahead and above everyone else.   They don't have to 'sell' the idea to anyone.  Living car-free isn't an absurd idea here. The transition can be gradual. They won't have to go 'all in' on day one. They just start upgrading from their current cars to driverless.  The capital expenditures would be phased in and mostly offset by revenue. 

I started writing this with a full head of steam and now as I'm a few paragraphs in, I'm remembering I'm on vacation and should be relaxing, so I'm going to cut this short and wrap it up, half baked as it is.

Monday, November 16, 2015

I have to rant against PayPay (and a lot of other 'self service/help' docs.

Just venting some frustration with PayPal.

So I moved more than 2 years ago.  I've updated my address everywhere that paypal will let me.  However, I still get my old address filled in by default on websites.  A Lot. It's starting to drive me crazy.

So I open a support email with PayPall via there 'contact' page and vent a little. Not expecting much to happen, but what ever. Their software does some keyword matching and sends me some FAQ's.  Not a bad idea, except they're wrong.

The email says:

How do I update my mailing address?

Here's how to update your street address:

      1. Log into your PayPal account.
      2. Click the settings cog beside "Log out".
      3. Click Update beside "Address."
      4. Click Edit.
      5. Enter your address information and click Save.

If the new address is your home address, click Make Home. If it is a business address, click Make Business.

Here's how to remove your old address:

      1. Log in to your PayPal account.
      2. Click the Profile icon beside "Log out."
      3. Click Update beside "Address."
      4. Find the address you want to remove and click Remove.  

A few things about this.  One the two steps are different. Once says 'click the settings cog' which is right, the second says 'Click the Profile icon' which doesn't exists.  It's on the same page.  Someone didn't bother to proofread.   Now, assuming you figure out that they really meant cog icon, you get this:

There's no Update anywhere on the page!   The only occurrence of the word is a link to "policy updates" which is a footer on every PayPal.com page.   

I'm supposed to trust paypal with my money when they can't get the simple stuff right? As with most companies, it's not a wether you do the right thing in the big moments, but rather if you do them in the small moments.

Anyway, rant over.  I feel slightly better.

Tuesday, September 8, 2015

Locked out of my August smart lock (sorta)

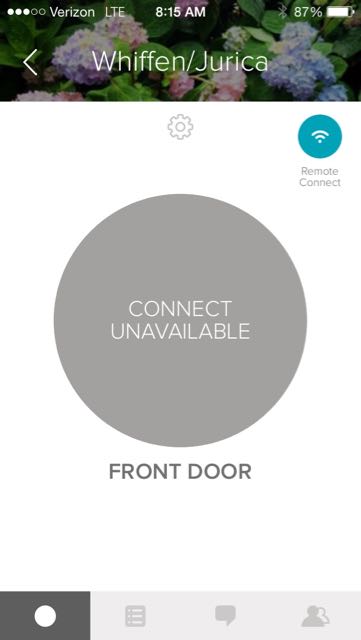
A deliberately salacious headline.  So this morning I had this sneaking suspicion that I forgot to lock the door.  No problem!  I bought a smart lock just to solve this problem!  Open the app, click the wifi button and this is what I see.


GAH! the wifi connect has failed again!  Commute back home from work and sure enough, the red light is blinking.  This is the 3rd time the remote connect has let me down.  It's to the point now where I don't trust it and almost wish I'd never gotten it.

The app needs an upgrade.  It should give me a warning when the WiFI can't phone home.  It should also restart itself if it can't phone home after X hours, where X is a configurable number.  I've sent my suggestions via their support channel, we'll see what they say.

Overall, I'm not as happy as I could be with this setup.  When it works, it's brilliant, but the large size of the nob, the cover falling off when smaller hands try to turn it and now with the issues with the wifi connect cropping up it's harder and harder to recommend this.

Saturday, July 27, 2013

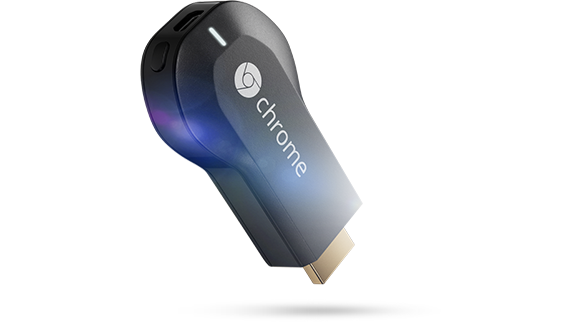
Ordered a ChromeCast

I, like a lot of gadget obsessed people, was intrigued by the google announcement of their ChromeCast device. It will probably upset most of the content providers to the point that they will put restrictions on it (I agree with Mr Kafka's assessment of what content providers reactions are going to be).

Not going to re-hash it hear other than to say it plugs into your TV's HDMI port and then allows you to display stuff from your Google device (tablet, phone, chromebook, etc) onto the TV. It has an amazing price point: $35. It will eventually work with all Google Android and HTML5 based apps.

It's basically going to be Google's 3rd attempt at getting mobile and web content onto the TV. First there was Google TV which didn't take off. It was cool, but not cool enough. It's still around, but it's kind of an afterthought since most smart TV's already do what it did for you. Next came the Nexus Q which was another flop. So much so that the google play service doesn't even work with it anymore. Now we have the ChromeCast.

The initial user reports coming in are all overwhelmingly positive, but they were pretty positive for the first two attempts too. Here's why I think it's going to be a hit: Price point. It's so cheap people will buy one even if they're not 100% sure they'll use it. There are a truckload more android phones out there than before. It's very simple, no wires, adapters or power cords.

Apple has it's version of this technology called AirPlay, which as been around for a while. It didn't get a whole lot of traction. The ability to stream music from my iMac to my Airport Express was neat, but not the ultimate solution. Then came the AppleTV. Ok, little cooler, now I can play to my TV speakers, both audio and video. Add iPhones to that mix, and it started to take off a lot more. My kids and their friends make videos on the iPad and then instinctively know how to double tap and bring up the output selector and stream their new creation to the TV instead of huddling around the small screen. I also have an iHome W3 portable speaker I recently acquired to play music from my phone, tablet or PC.

Here's one interesting aspect of AirPlay that I don't think Chromcast can match in it's current incarnation. On both my AppleTV and W3 speakers I have control buttons (a remote for the AppleTV, they're built into the W3speaker). If I press those buttons while someone is streaming to the device, the remote presses are sent to the streaming device. So if my phone is in the charger up stairs playing music to the speaker in the kitchen, I can play, pause, volume up/volume down with out having to go to the source device. I think that's missing in the ChromeCast device. How many people have a phone charger on the couch with them so they can keep their phone with them while it's streaming without worrying about battery? The notion of the phone/tablet being the player and the remote is going to present some battery life issues for people who don't charge their phone in the same room as they chromecast. It's still going to sell like crazy though. It's already sold so many that google has stopped the 3 months of free Netflix promotion.


Friday, August 3, 2012

Mountain Vista, er I mean Mountain Lion

So I've been running Mac OS 10.8 'Mountain Lion' for a little over a week now and I am not impressed at all.  Fortunately it's only $20, but So far I have yet to utilize a single new feature in it. Messages plain ol' doesn't work for me.  I still have an @mac.com email address for my apple ID so there is all kinds of no-joy for messages.  I use Outlook for work, so I don't need reminders, and I use Evernote, so Notes is superfluous for me (and rather crappy to boot).   So far this is the Windows Vista of upgrades for me.  It added security, which is annoyingly getting in my face, it seems slower on some things (I get more beach balls than pre-upgrade) and of all the claimed new features, I don't touch most of them.  Yup, it's vista.

Worst part of the upgrade to me is that my trusty old 2007 MacBook Pro isn't supported anymore.  It's had a reasonable run, but it's sad when a still viable device is left behind like this.  Oh well, I guess Apple can't hit it out of the park all the time.

Tuesday, November 15, 2011

Light Strike Bits decoding spreadsheet

I've taked a few times about 'decoding the bits' so I thought I would finally get around to putting up a spreadsheet for anyone to see. A quick refresher of how I'm counting/tracking the output from the light strike devices: 65 'signals' come from the device. They come in two types: Pulses or Spaces. This is what the LIRC software refers to them as, so I just continue that. If it's wrong, it's GIGO from LIRC to me to you. The first signal is a large pulse, typically double the value of all other pulses you will get. This is the 'frame start' if you want to think of it in terms of a networking packet. The next 64 'bits' of information are alternating pulses and spaces. The pulses are constant. They're the markers between spaces to let you know when a space starts and ends. Since the pulses are simply borders for your spaces, you are left with 32 bits of data in your frame. Because I cheat and take the output from one of the LIRC utilities rather than reading the pulses directly, I count the pulses and spaces together for 64 'bits' in my coding (mostly because when I started I wasn't 100% sure if the pulses might have a hidden significance). So when you view the spreadsheet, even numbers are the spaces, odds are the pulses.

Here is the google docs spreadsheet of my light strike bit decodes.  There are four tabs, one for the rifles, one for the pistols, one for the ITS and bit math where convert the bits from binary to base10 numbers to see the relative values.  The pistols sheet is a work in progress, I only took one stab at decoding the only pistol anyone in my group has.  It had surprising results.  A laser strike from a pistol is different than the laser strike from the rifle.  It makes sense in a way.  The rifle bits add up to the number 1344, but the laser strike on the pistol is only 258 it seems.  They seem drastically different which means I should probably revalidate the values coming out of the pistol.

I'll probably create a code.google.com project to dump my simple perl code into at some point too, with the hopes that someone who is an actual developer can take it further.

Monday, November 7, 2011

Light strike scope accessory tear down

So I got around to taking apart my Light Strike scope. I didn't like that my gun was black but the scope is brown. I also didn't like how it looked or the plastic used to simulate the optics of a scope.

NewImage
Other than enabling the two shot types for your gun, it wasn't that appealing to me over all and I doubted I would ever actually use it. So I decided to break it open. Break is the operative word here. Even after you remove the numerous screws hiding under the stickers (six of them I think) the scope doesn't come apart easily. The front plastic lens housing is essentially melted/glued in place. So you would not be able to take apart your scope and put it back together. I was thinking it might be fun to put a real laser pointer inside or some thing to act like a reflex sight to make it look cooler. No such luck.
NewImage
There really isn't much to the scope. It doesn't actively do anything other than flash the LEDs and enable the fire modes in software. I'm guessing some transistors and capacitors or resistors. I don't know how to tell the difference between SMD capacitors and SMD resistors. They have numbers like 101, 470 and other such values on them. The transistors have numbers too but I can't read them (they have three solder points so I'm guessing they're transistors). From there its a ribbon cable to the multicolor LED and red LED. The multicolor is the one that lights up the plastic dome on the top of the scope with your team color. The red one simply makes the red dot appear in the center of the rear optic.
NewImage
So it would be quite simple to replace those two with something else like a real laser pointer. I took a laser pointer from a trade show apart and extracted just the laser goodies out of it, so if I can find something cool the mount it in, I will likely take the red LED out and replace it with a laser pointer.
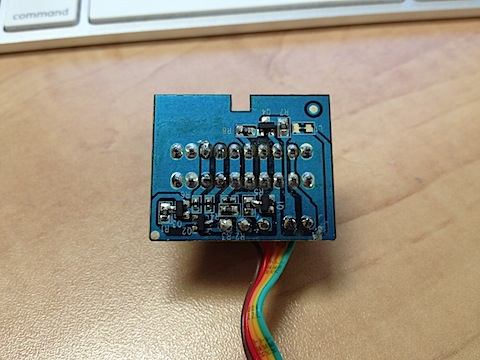
scope pcb
Here's a closer view of the PCB.

Another interesting thing I found out: the ports are not interchangeable. You cannot plug the scope into the launcher/rapid fire port. The gun shuts down if you do. So my theory that the ports were a parallel bus before is wrong. Thankfully the gun doesn't fry if you plug it in backwards or in the wrong port. Anyway, there yo have it, the internals of the scope. I might decide to take apart the rapid fire system to see what's inside there as well.

Wednesday, October 19, 2011

iCloud and iCal part two...

Well, still no traction on why iCloud spammed former clients with appointment accepts. I did get an email from Ed K. who seems to have the same problem and like me can find little or no information on it. If you're iCloud is accepting old appointments, pile on a discussion thread I started: https://discussions.apple.com/thread/3411914 and maybe we'll get some traction that way.


This is the real danger of the cloud. All of the forensic data I would normally use to track these kind of issues down are not available to me. The cloud owns them and they are not going to be forthcoming with information about errors and outages. I think that's an interesting aspect of cloud computing that is worth some discussion. Security in the cloud is an issue for a lot of people because it's very difficult to know who truly can access your data. I think it becomes even worse if someone does get your data and you need forensic data to track it down. For example if you are a new start-up and have some super-secret and valuable information that is stolen via the cloud, would Amazon give you all the information you would need to track the perpetrators down? Just because it's valuable to you, doesn't mean it has the same value to Amazon.   


As an aside, my choice of Amazon isn't meant to imply that they would or would not behave badly in that senario, just talking in hypotheticals.


My first Light Strike Mod and tear down photos

All right! It's light strike mod time! I've decided to hack my  D.C.R.-012 and do some mods to it. After you remove the stickers (which is a little too easy, the adhesive isn't very good) it looks like this:
Gun right
Gun Left
The little copper patches are the 'switches' from the stickers. They are capacitance sensor based, which is neat and disappointing at the same time, because it make putting a real switch there complicated. Anyway, on one side there are a boat load of screws that need to be removed and the orange end-cap on the barrel needs to be taken off (comes off easy). After that, you see something like this:
Inside of Gun
Picture is a bit blurry, but you get the idea.
gun close up
The 'brains' are interesting. Everything is clearly labeled in english for what it does. Things like CAP_SENSOR, LIFE, RELOAD or IR_RX so drastic mods would be pretty easy. The mount points for the attachments seem to be in parallel so they're likely only restricted by the plastic mount shape rather than the actual location. It would be interesting to see what would happen if you grafted a 3rd mount point on. Could you activate the tracker at the same time as the scope and launcher attachments?
gunfront
Looking at the IR blaster (the opaque lens) and receiver (the black circle with the silver X on it)
gunimitter.png
The IR transmitter with the cone and lens removed.


I'm not doing much today, just changing some LED colors. the life bars are 3 red LEDs. Going to make them 3 different colors (well, specifically changing two reds out)
gunleds.png
unscrewed them and soldered in a green and blue that I took out of some of my kids toys (sssshhh, don't tell! They were broken anyway). I would have rather done green -> yellow -> red but none of the toys had any yellow LEDs. I guess I could have gone white and then put a yellow film, but I'm just screwing around so what the heck.
bluegreenred
First off, this Point-and-shoot camera stinks. Second, here's the two new LEDs in place. They're rounded on the top and the originals were flat, so I get a different light distribution in my new LEDs that isn't ideal. But it does work:
gundone
So now when I get hit, I lose blue -> green -> Red health bars. Some future mods I think I might do:

  • Move the on-off switch to where the head phone jack is. The headphone jack location would allow me to turn it on and off one handed while gripping the gun.
  • Try to get a mechanical switch to work with any of the buttons. In particular, weapon select would be neat to make into some kind of rotary or dial type button. A toggle switch for single fire/semi-auto fire, etc.
  • Graft on some 'extra bits' to give the gun more profile relief. I can't for the life of me figure out why they made all these guns so flat. I have some plastic tubing and other ornaments I could put on the sides with some LEDs to spruce up the side profile.
  • Paint job. I've been stalking the Nerf Modding forums looking for tips and pointers for how to paint plastic guns. So far I have a few ideas. I'll probably just go with basic silver and red to match the grip plastics

Next I take apart my scope and rapid fire attachments.

Monday, October 17, 2011

iCloud and iCal accepting old appointments :-(

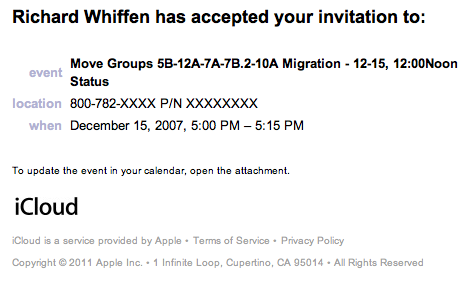
So Friday I received a bunch of out of office replies from former Co-workers who I did not email. Uh oh, some virus/malware is running somewhere. Panic level went to 11. Continued to sort through them, and a few were direct replies. I read them and Ed and Brian are asking me why I'm accepting appointments for meetings that have already past. Oh boy, this is going to be hard to track down. It could be a phone based malware, Mac/PC or an epic hack in the cloud.

Oh, did I mention I had just upgraded to iOS 5 and Mac OS X 10.7.2? Yup, sure did. Wasn't able to migrate my MobleMe stuff because the servers were too busy (which is a topic for another rant, since this problem has been solved in the industry multiple ways). So the iCloud transition has none of the fit and finish that I was expecting. Especially considering how bad MobileMe was. Even .Mac was better then MobileMe and .Mac couldn't sync for beans (again another problem that had been solved numerous ways yet ignored). Steve Jobs was supposedly personally involved with iCloud because if is tremendous dissatisfaction with MobileMe and it's reliability. Well they must not have fired the right people because iCloud has been a bumpier ride than MobileMe for me personally.

So back to my 'malware' problem. My Malware goes by the name iCloud. So when I converted my AppleStore account to iCloud (which is another problem I now have two iclouds and can't merge them) it took my home and work calendars into the iCloud. When doing so it went and accepted (and sent responses) to meetings that have already occurred. In 2007. Yup, I'm accepting 3 and 4 year old meetings that I already attended. This seems like a catchable senario to me. What possible reason for accepting a meeting that's already passed could their be? I would concede that there might be a need to accept an appointment that's up to a week old for some kind of tracking/verification purposes, but 3 years?

Icloud calendar

A bunch of googling didn't turn up others with this problem, so maybe there's something unique to how I did it. I took events from my GoogleApps email and accepted them on my .Mac enabled Laptop. I'm actually quite disappointed that iCloud dared to communicate on my behalf with out asking me. I should have been given the option to not send a response like I am with other well behaved calendar apps. I have a few more computers to upgrade. We'll see if I accept more phantom appointments. Oh well, another year, another disappointment with the Minnesota Vikings and Apple's cloud services.


Thursday, October 13, 2011

Decoding the Light Strike ITS

Ok, spent 10 minutes after lunch looking into the ITS signals.

ITS

You'll have to read the previous post about bits, to know what I'm rambling about, but in essence the significant bits were the even bits between 40 and 62. Not all are used, but I haven't tried all the guns and option combinations yet. So the ITS (Intelligent Targeting System) has 3 modes. Sentry mode - you have to hit the target 5 times, each time you hit it, you light up a bar with your team color. Fifth hit turns it into a sentry for your color. It blasts out random shots until it's captured by another team. Bomb Mode - similar, you get 5 hits to activate the bomb, 6th hit to set it off, which spins the device and it emits shots in every direction and makes an explosion sound. Medic Mode - 5 shots to capture again, but now when you shot it a subsequent time, it puts health bars back on your gun.

So if you activate the sentry, the bits that go high (in addition to the team bits) are: 40, 42, 44, 46 and 56 which in my 'bit math' comes out to a strength of 3848, the strongest shot yet. So far, nothing too unusual.

If you activate the Bomb, however, things get interesting. The bits that go high for blue are: 28, 40, 42, 44, 54, 56. Bit 28 is the new rascal. If you do it as Red, bits 28, 30, 40, 42, 44, 54, 56 go high (in addition to the team bits) - both 28 and 30. Yellow is just 30. Green is just 28 again. I was hoping that green would be both 28 and 30 low. That would make bit s28 and 30 a team marking, but it isn't. So why are blue and green the same, while yellow and red are different? A mystery for another day I guess.

Next up, Medic mode… this would be a fun one to clone into a smart remote or other IR blaster device. You could leave a 'stim-pack' like in the video games around the playing field. Medic mode is the most different code thus far. It broadcasts bits 8 and 40 for every team, and then you get a simple 3-bit mapping for the team color with bits 58, 60 and 62. So 58, 60 and 62 are blue, 58 is red, 58 and 62 are yellow and 50 and 60 are green. This is the first use of a bit below 10 and uses a different set of bits to mark color. What would be interesting is if you could send a 40 and 42 along with the rest to see if you get more health back per shot.

If I'm reading things right, it would seem that 2048 is the number to take a health bar on or off. So now I just need to finish writing my code to recognize these different flag values and then start painting the screen the correct color for the flag.


Wednesday, October 5, 2011

More Light Strike attachments and decodes

So Adam bought the G.A.R.-023
gun1refractor.pngscope.png
And two accessories, the scope and the refractor launch system.
rapidfireits
I went and bought the same scope and the rapid fire system. I also got the ITS - Intelligent Targeting System. So we now have every offensive add-on (missing the detector, but that's passive/defensive so we can go on with out it). With these attachments you get an Optic strike and Refractor strike with the scope and a launcher strike with the RLS and Rapid Fire with the RFS. The RLS and RFS strikes are actually two things, a distinct IR code and three consecutive hits. So now I have decoded these light strike mods and their data bits.
If you recall, the bits in play are: bit 40, bit 42, bit 44, bit 46, bit 50, bit 56, bit 58, bit 60, bit 62. We now get to add bit 54 and bit 46 to the mix.
High bits for Optic strike: 40, 44, 56, 58
High bits for Refractor: 40, 42, 44, 54, 56
High bits for RFL: 40, 42, 46, 58, 60
High bits for RFS: 40, 42, 60, 62
If you make that a 12-bit binary, you get:
Optic: 2572
Refractor: 3608
RFL: 3334
RFS: 3075
Making the RFL the device to have it seems. In practice it is deadly too, it takes 2+ bars off your gun per shot, but has a long recycle time. Not sure when I'll get to it, but at some point I'm going to decode the ITS. When you capture the ITS for your team it can then do three things: 1 - Sentry mode, it spins and shoots randomly, only damaging teams of other colors. 2 - Bomb mode, you can activate and detonate a bomb doing massive damage (I'm assuming, haven't set it off yet). 3 - Medic mode, when the capturing team shoots the target, it beams back a health bar. Medic mode will be the most interesting to me. What does it send? Could you program a smart remote to record that signal and then have your own version of a med-pack like in the video games? There are other light strike mods we're thinking of too. A fun one might be to make a trip wire. Set off the sensor and an IR damage flash goes off. Or a death room, a room where you continually take low damage doses. It would be like crossing the lava or nuclear waste areas in Doom or Quake.
We spend 10 minutes or so goofing around with it this morning. First time we actually did some real shooting, and it went awesome. This is going to be really fun! Got an uptick in website traffic this week. Going to have to see what search terms bring you to these posts. Probably light strike hack or light strike hacking. I wonder if I show up for light strike mod at all. Probably will after this post.

Monday, October 3, 2011

Light Strike decodes so far

Ok, so I've been working on software to work with the Light Strike laser tag system. In the long run, I still want to hack the light strike targets and light strike laser tag guns but for now I'm settling for decoding the pulses from the guns themselves. For everyone who hasn't been following along (and it's riveting, how could you not!) a quick re-cap.

Using a USB-UIRT device I am able to receive the pulses coming from the gun. The signal starts with a pulse of ~6700 (sometimes higher, sometimes lower). Followed by 32 interleaved pulses and spaces that hover around 700. The spaces and pulses are effectively 64 'bits' although it seems only the spaces are actually used, not the pulses as I previously thought. The output clearly spaces, but because that made no sense to my brain, so I said pulses in previous posts. Anyway the way I'm tracking it, I'm counting the spaces and pulses just in case I get a surprise somewhere. The spaces that have meaning hover around 3200. So in my code I just look for greater than 5000 for the 'frame start' and greater than 2000 for the 'space' to be a high bit. Keep in mind I'm counting pulses and spaces when tracking them and I start at zero (because it's not confusing enough right?), so if I say bit 4, I mean space(0), pulse(1), space(2),pulse(3),space(4). If you don't like it, divide them by 2 to get the 'space' position only (which is why I started with zero). So far here are the bits of note:

BIT 10 - always high in the two assault strikers I've tested: G.A.R.-023 and D.C.R.-012

BIT 12 - part of the team color

BIT 14 - part of the team color

12 and 14 high = blue

12 and 14 low = red

12 low and 14 high = yellow

12 high and 14 low = green

With this info, I can now determine what color shot the IR sensor and can effectively write my own target for capture the flag.

But wait theirs more! For shots:

bit 40, bit 42, bit 44, bit 46, bit 50, bit 56, bit 58, bit 60, bit 62.

High bits for Laser strike: 42, 46, 60

High bits for Stealth strike: 42, 44, 60

High bits for Pulse strike: 42, 44, 46, 60, 62

High bits for Rail strike: 40, 58, 60

High bits for Sonic strike: 40, 46, 56

So there is rather some reserve bits in the middle or the assault strikers add ons use the middle bits in the low 50's. If you read the bits from right to left starting at 40 and ending at 62, you have a 12-bit number that gets bigger the more powerful the strike. I vaguely recall 12-bits being important in the IR remote space, so maybe that's why. Maybe my math is off too. Anyway, if you take my 12 bits as binary numbers:

Laser - 1344

Stealth - 1538

Pulse - 1795

Rail - 2054

Sonic - 2312

Stealth strike may be an outlier, because I'm not sure that it's stronger than a laser strike in terms of damage done to the other guns. Anyway, since I can decode strike values, and I have orders of magnitude, I can do some fun stuff with my computer based target. For example, I can have degrees of team color. You could have a laser strike be +1, stealth +2, etc. And every time you shoot my target, the counter goes up (or the team color level bar could fill more screen) up to a maximum number, say 5 or 6. Then to recapture the flag, you would have to take away the apposing teams hits first, before you could turn it to your color, making capturing and holding a flag a little more interesting.

I'm still tweaking my perl code, but in short, I went the


open(MODE,"mode2 --driver=usb_uirt_raw --device=/dev/ttyUSB0|") || die "Unable to open mode2\n";

route to get the data. The mode2 binary from LIRC does a great job for me already, why re-invent the wheel at this point? I have it capturing the 'high' bits and printing the team color so far.


---- SHOT ----
10 - 3150
12 - 3200
14 - 3150
42 - 3150
44 - 3200
60 - 3200
---- SHOT ----
COLOR: blue
---- SHOT ----
10 - 3200
12 - 3200
14 - 3200
42 - 3200
44 - 3200
60 - 3200
---- SHOT ----
COLOR: blue
---- SHOT ----
10 - 3150
42 - 3200
44 - 3200
60 - 3150
---- SHOT ----
COLOR: red
---- SHOT ----
10 - 3200
42 - 3150
44 - 3150
60 - 3200
---- SHOT ----
COLOR: red
---- SHOT ----

So I'm getting pretty close!

Friday, September 30, 2011

Perl code for Light Strike decoding

Making progress on my quest to write a 'capture the flag' module for the light strike laser tag guns. Some googling found me this code from Kenneth L. Root. <http://the-b.org>. I hacked it into this the other day and am able to get this output now:


root@rwhiffen-OptiPlex-GX280:/tmp# ./light-strike.pl
Opening port: /dev/ttyUSB0
Opened port /dev/ttyUSB0
Shoot the gun at the IR Sensor
IR Code: 0xe6 0xc2 0x87 0x0d 0x12 0x0e 0x12 0x0e 0x12 0x0e 0x12 0x0e 0x12 0x40 0x12 0x40 0x12 0x40 0x12 0x0e 0x12 0x0e 0x12 0x0e 0x12 0x0e 0x12 0x0e 0x12 0x0e 0x12 0x0e 0x12 0x0e 0x12 0x0e 0x12 0x0e 0x12 0x0e 0x12 0x0e 0x12 0x0e 0x12 0x3f 0x12 0x0e 0x12 0x40 0x12 0x0f 0x11 0x0e 0x12 0x0e 0x12 0x0e 0x12 0x0e 0x12 0x0e 0x12 0x3f 0x12 0x0e 0x12 0xff
root@rwhiffen-OptiPlex-GX280:/tmp# ./light-strike.pl
Opening port: /dev/ttyUSB0
Opened port /dev/ttyUSB0
Shoot the gun at the IR Sensor
IR Code: 0xb9 0xc2 0x86 0x0e 0x11 0x0f 0x11 0x0f 0x11 0x0e 0x12 0x0e 0x12 0x40 0x12 0x3f 0x12 0x40 0x12 0x0e 0x12 0x0f 0x11 0x0e 0x11 0x0f 0x11 0x0e 0x12 0x0e 0x11 0x0e 0x12 0x0e 0x11 0x0e 0x12 0x0e 0x12 0x0f 0x11 0x0e 0x12 0x0e 0x12 0x40 0x12 0x0e 0x12 0x3f 0x12 0x0e 0x12 0x0e 0x12 0x0f 0x11 0x0e 0x12 0x0e 0x12 0x0e 0x12 0x40 0x12 0x0e 0x12 0xff
root@rwhiffen-OptiPlex-GX280:/tmp#


So I'm getting closer. The results are more inconsistent with the perl code than with the 'mode2 command, which makes me think I might want to do some 'expect' style perl coding with the app rather than direct. maybe something like:


open(MODE,"|mode2 --driver=usb_uirt_raw --device=/dev/ttyUSB0 --mode");


And then do all my interacting with the output via the MODE file handle. That would allow me to get some basic functionality going.


Wednesday, September 28, 2011

Light Strike IR decoding part 2

The continuing saga of my efforts to hack a light strike laser tag system by reading the infrared signals it puts out…

Ok so I just went from being totally stuck and posting that blog post, to being unstuck in about 30 minutes. Ok, so in the last post, I was thinking I needed to figure out what the bit encoding was for the pulses coming in. WHen you look at the in a long row, it's hard to see the patterns. So I was reading the man page for mode2, and it says there's another command line switch called --mode, which is helpfully described as " enable alternative display mode". Ok, what could it hurt right? So I ran it. Instead of getting the two column pulse/space list, you get a more helpful:


6700     650      900      700      900      700
900      700      900      700      900     3150
900     3150      900     3150      900      750
850      750      850      700      900      700
900      700      850      700      900      700
850      750      850      700      900      700
900      700      900      700      850      750
900     3200      850      700      900     3150
900      700      850      700      900      700
850      700      900      700      900      700
900     3200      900      700      900  1382500


Which is a lot easier to read, and makes deltas between two different settings stand out. That one was a blue, this one is a red.


6700     650      900      700      900      700
900      700      900      700      900     3150
900      700      900      700      900      700
900      700      900      700      900      700
900      700      900      700      900      700
900      700      900      700      900      700
900      700      900      700      900      700
900     3150      900      700      900     3150
900      700      900      700      900      700
900      700      900      700      900      700
900     3150      900      700      900  2267300


Notice how C2 R3 and C4 R3 change from 3150 to 700? That pattern holds for yellow and green as well. You end up with a pretty simple table:


If you count the spaces as clock ticks and the pulses as 'bits' you can then start to map things out. The last huge number in C6 R11 is the time between the last event and the next event. The last event recorded does not have this value, it is blank and can be discarded. The first pulse is a 'double-high' value which marks the beginning of a frame. This gives you effectively 32 bits. Now I just have to get a perl or python script to read the device instead of the 'mode2' command and I'm off to the races. That will have to wait for another day however, because I need to get back to work.

Light Strike laser tag

After reading a review on Ars Technica: Lawn warfare: Light Strike brings laser tag back home I decided I had to have some of these at the office. They're pretty cool, mostly gimmicks but they do work. I bought myself a D.C.R.-012. Am probably going to pick up some of the accessories as well. I've talked some co-workers into buying them, so we're almost ready to have some office warfare.

dcr-icon

The trick is, you can only 'death match' each other for so long. And most of the that would be on the honor system, since you can self-respawn quickly. So I've set out to try and make my own 'targets' or flags to play capture the flag with. I have some USB-UIRT devices. I found some Linux drivers at LIRC.org and a CPAN perl module for the driver. So far, so good. I'm able to detect gun output by running:

mode2 --driver=uirt2_raw --device=/dev/ttyUSB0

From the command line. It gives me output like this:

pulse 6650
space 750
pulse 850
space 750
pulse 850
space 750
pulse 850
space 750
pulse 850
space 750
pulse 850
space 3200
pulse 850
space 3200
pulse 850
space 3200
pulse 850
space 750
pulse 850
space 750
pulse 850
space 750
pulse 850
space 750
pulse 850
space 750
pulse 850
space 750
pulse 850
space 750
pulse 850
space 750
pulse 850
space 750
pulse 850
space 700
pulse 850
space 700
pulse 850
space 700
pulse 850
space 750
pulse 850
space 3200
pulse 850
space 700
pulse 850
space 3200
pulse 850
space 750
pulse 850
space 750
pulse 850
space 750
pulse 850
space 700
pulse 850
space 750
pulse 850
space 700
pulse 850
space 3200
pulse 850
space 750
pulse 850

Unfortunately subsequent firings do not give me identical values. Some times the pulses are 50 higher, so 6700 rather than 850. Perhaps worse still, the other three colors (that was a 'blue team' laser) seem to have the same values. Next I'm going to plug it into a windows machine and run Girder on it and see what that gives me.

Google wasn't very helpful, perhaps because Light Strike isn't a unique term to the laser tag guns. It's used in other contexts as well. So I think I'll pads this post with light strike hacking and other google-able terms. Light Strike IR hacking is a good example of what I was hoping to find a post about. ANyway, hopefully someone who is searching for linux IR hacking light strike guns will find me and we can team up.