Monday, July 19, 2021

printing with PETG in my Prusa Mini


So I bought a low-cost spool of OVERTURE 3D PETG from amazon - it was on sale for $21, so I went for it.  First off, Overture's packaging was good and came with a 20cm x 20cm build surface sticker.  It's too big for the mini, but might come in handy with my MonoPrice printer at the office.  It also came with an overture branded ruler/card type thing that's making a nice bookmark in my Foundation and Empire book.  Trying to read them before the series drops on AppleTV+, but I digress. 

My first print was a small tilt box I found on Thingverse.  It came out really well!


It also came off the bed with out any issue (more on that in a few).  

Next up I wanted to print some buckles that would work with some web strapping I have around the house from a previous halloween costume build.  There were a few out there, but this one on the Prusa Prints gallery was the one I went with.  I printed it twice, with supports both times.  Not sure if I needed them or not, but it looked like some of the spans might be too big to cover with out supports.  They came out great and work pretty well.  I left the straps extra long so I can tie a knot if the buckle fails on me just in case.


The only issue I had was taking the brim and support material off the standard prusa mini bed.  It was stuck on like superglue.  I almost scratched the bed trying to get the excess off.  It took some searching to figure out what was different.  In the tilt box case, I let it run over night and took it off the build plate the next morning.  With the buckles, I was printing them back to back and trying to remove them without letting everything become truly cold.  In the various forums I see all kinds of tips and tricks - glue stick, windex, other release agent kind of stuff.   Then I decided to see what the manual said.  Should have started there in hindsight. 

Heatbed: Various manufacturers suggest using various separation (or adhesive) layers for printing PETG, such as Kapton tape, glue stick, etc. Our print sheets work fine without these separation layers but it’s important to know a few basic rules. First, keep the print surface clean. When printing on a smooth sheet, use a window cleaner instead of isopropyl alcohol. Textured powder-coated sheets can be cleaned with IPA. Once you finish printing, let the print cool before you try to remove it from the sheet. 

And there it is. Let it cool completely before removing.  I will probably try using windex to clean the bed next time instead of the alcohol wipes, but other than that, patients will be my go-to move.

Friday, April 30, 2021

Using my 3d pen to weld parts together

 Ok so I was cleaning out my shelf and found a 3d pen I had from a while back.  I think I got it on Woot.com or something like that for super cheap.  They go on clearance at places like Michaels and JoAnn craft stores as well.  Amazon sells a bunch and recommends this one.  Mine is similar, but I don't think it's manufactured anymore. 

So what I didn't realize when I bought it is it uses the same filament as my 3d printer.  It makes total sense now, but I didn't connect the dots at the time.  I put my 3d printer filament in it and it extruded great! which gave me another idea - could I use it to repair, weld or fill a 3d print.  


The short answer is YES! I took two calibration cubes from my 'stuff I printed but is totally useless' box and tried to weld them together.  It worked pretty good!  I would need a lot of practice to get it smooth and neat, but it does work. I also filled in the X, Y and Z recessed letters to see how that would go and just like the weld, I need to practice and I think go slower - my pen has a variable feed rate to help this. I think it'll come in handy for some very specific use cases.


Anyway if you have a 3d print that you want to melt a little more filament onto for repair or aesthetic reasons, these 3d printing pens are a fun and relatively cheap way to go.

Tuesday, March 9, 2021

Got a new 3d printer

So I have a Monoprice Maker Select 3D Printer , which is a clone or re-market of a WanHao Duplicator i3 and have had a generally poor experience with it.  It's 75% on me, to be clear.  I knew it required tinkering and tweaking when I bought it.  I thought I was up to the task, but it turns out I'm not. Mostly due to the time commitment required up front.  That's where I came up short.  I have difficulty putting together the extended blocks of time I would need to make this very capable printer do what I'm looking for. 

prusa box

So I went out and bought myself a Prusa Mini+ (and a spool of  Prusament PLA Prusa Galaxy Black).  I wanted a printer that had a great reputation for easy to use and a large community.  I also wanted something relatively small footprint wise.  Lastly I was factoring price in the overall equation.  

The experience so far has been remarkable.  I had to order it 6 weeks in advance, the demand is so high that you can't really get it immediately.  The shipping from Prague, Czech Republic was amazing.  I received a tracking number Wednesday afternoon (after close local time) and had my printer Friday afternoon.  That includes clearing customs.  Amazing. 

configuration


It was pretty easy to set up and get working. The calibration and configuration is very easy and simple to follow.   I was up in printing in under 2 hours.  Could have been faster had I bothered to read the instructions before I started. The way they handle setting the z-height is amazing.  the auto-bed leveling is also automatic, which is my biggest issue with my old printer.


I printed a new set of knobs for my toaster from thingverse which worked out pretty good so far.


I also printed a support for my Dremel 4000 which is going to come very handy for polishing future prints.

Han Solo blaster receiver


Now I'm starting to print out the parts for a Han Solo blaster for a future costume I intend to build.  I didn't do a good job researching this. I've found alternate and perhaps better builds but this one is what I started with and I'm kind of committed to this.

Monday, March 1, 2021

The foggy future of 2.4Ghz Wifi

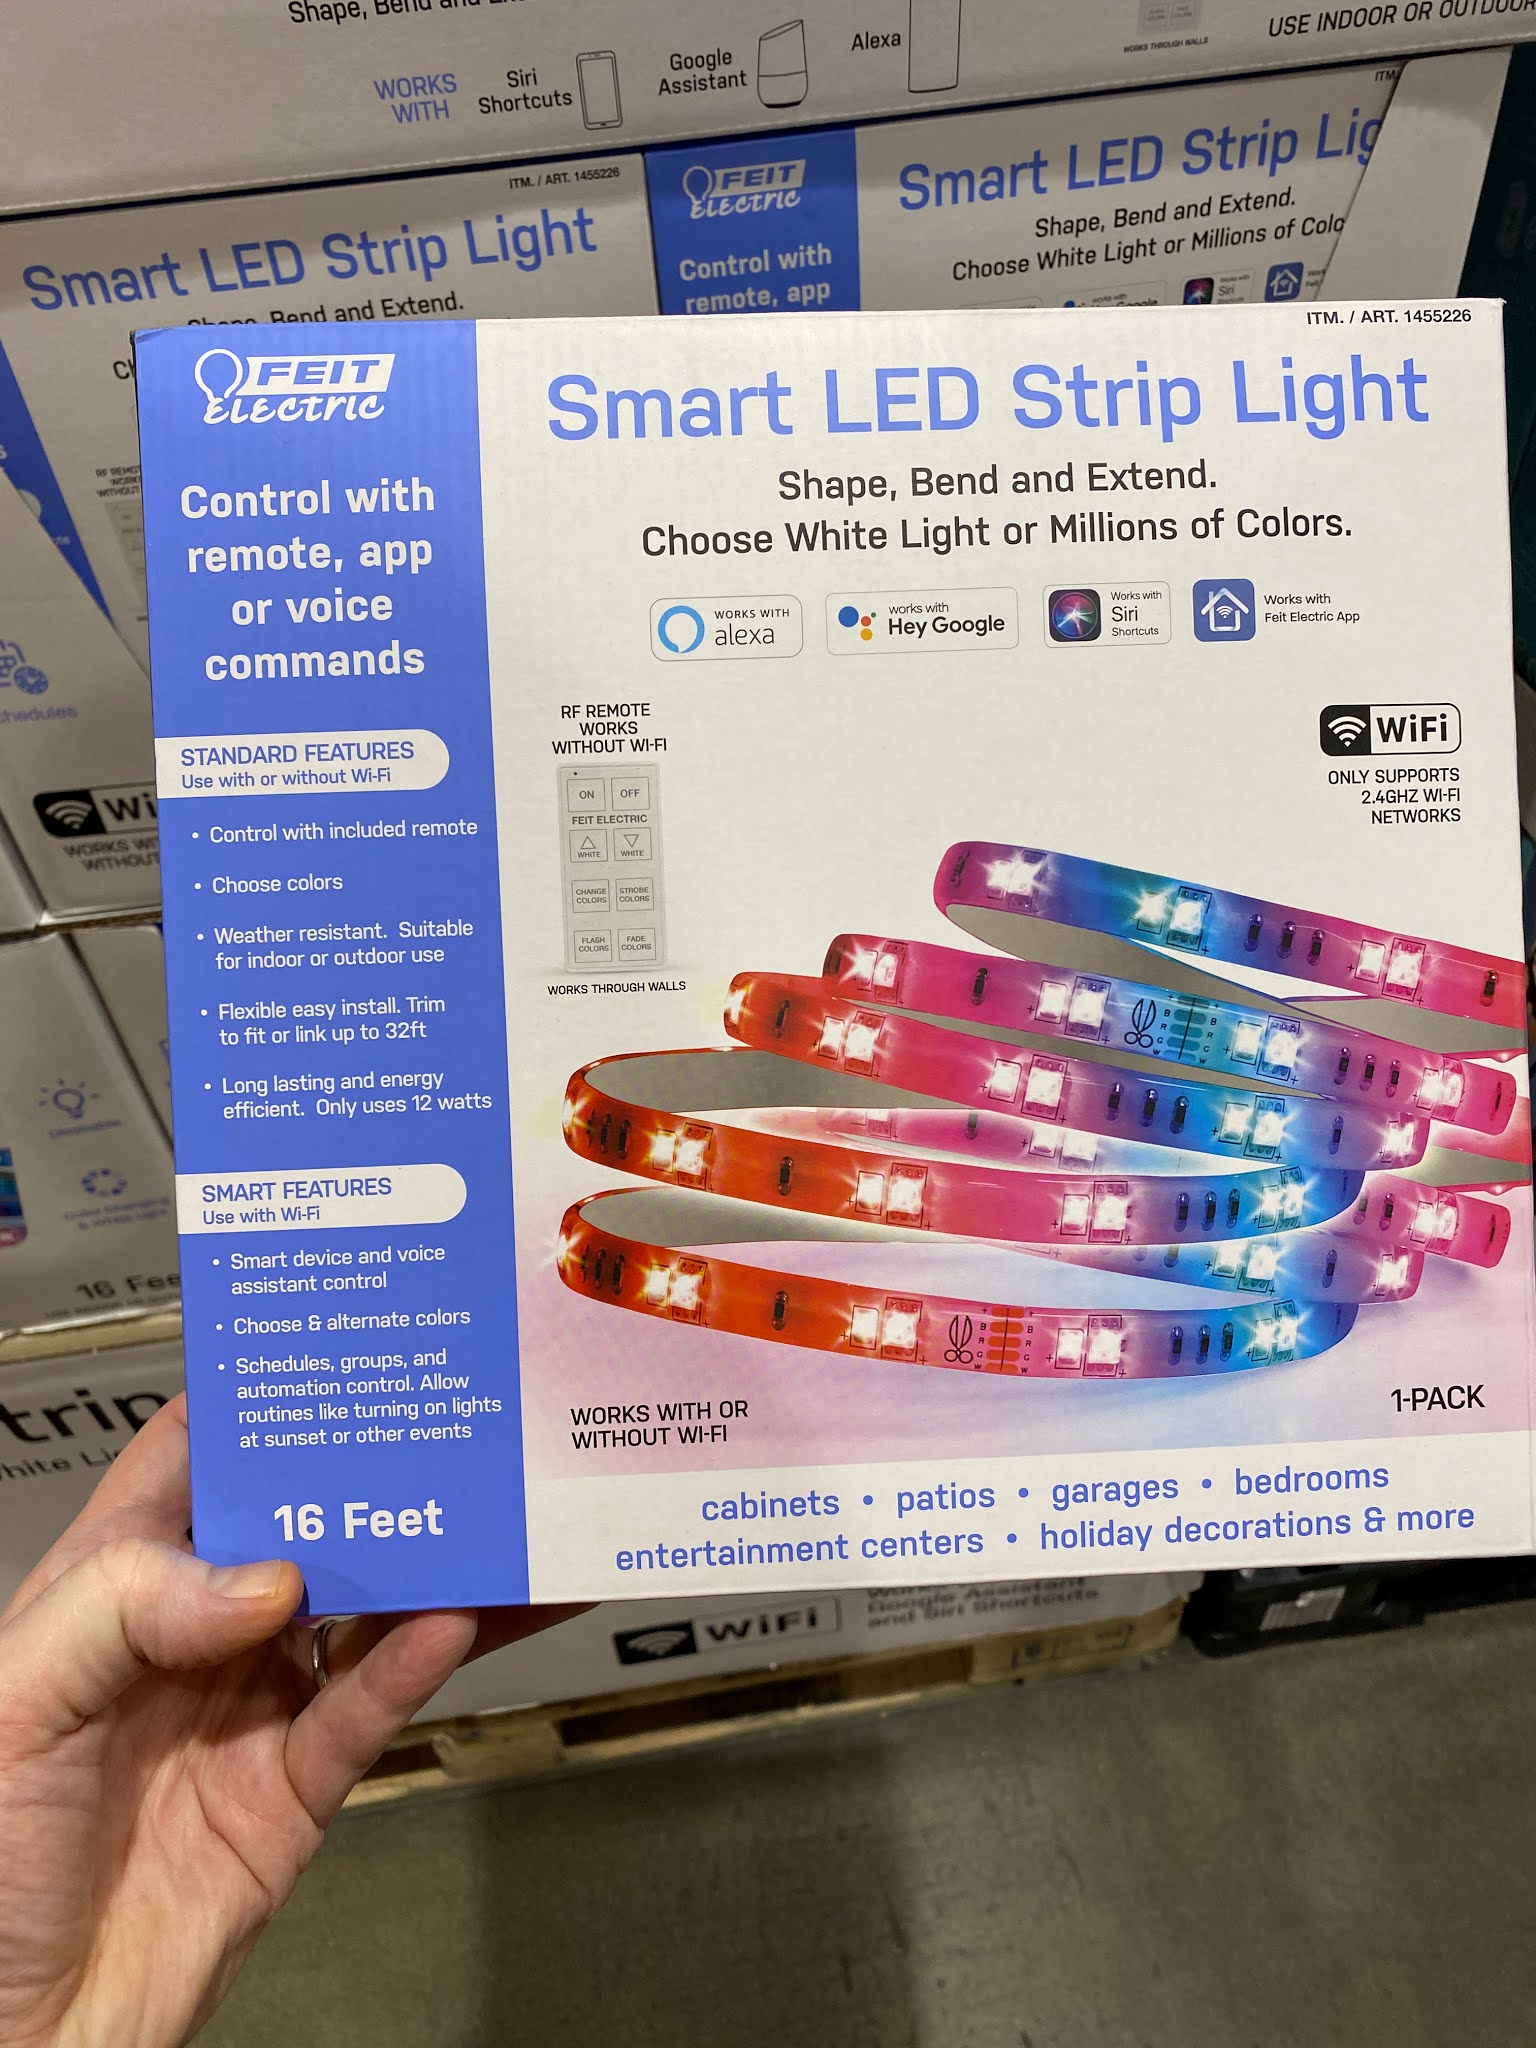
 Saw this packaging at Costco the other day:


The thing that caught my eye:


With the WIFI 5 standard being the 802.11ac spec, that's only 5Ghz and necessitates manufacturers include the wifi disclaimer on their packaging now.   Although the WIFI6 includes 2.4Ghz I'm not certain it will cover these older 802.11g spec devices.  It could be a confusing future for people and wifi.  I can foresee people getting their spiffy WIFI6 / 802.11ax networks online and getting blazing speeds to there phones, tablets and laptops only to find that their 10-year old doorbells, thermostats and smart fridge's can't connect.


Tuesday, February 16, 2021

The RP2040 is going to change things in the microcontroller space

This is a bit of a Captain Obvious statement, but the Raspberry Pi Foundation's RP2040 is going to shake up the microcontroller space.  I can't wait to play with this stuff.  For the most part I stay within the Adafruit ecosystem.  They are the "Easy Button"  of microcontrollers.  If you want to do stuff with out having an Electrical Engineering degree, Adafruit is hands down the way to go. They do so much documentation and easy to follow examples at learn.adafruit.com that you can self teach yourself how to work with microcontrollers. 

Picture of RP2040 Pico board
Raspberry Pi Pico - RP2040


The RP2040/Pico is the first time where I feel like I could sail beyond the safe harbor of Adafruit.  The open source and collaborative nature of the Pi foundation makes the information accessible and supported. Looking at the example projects on the Pi site for the pico you can quickly learn how to customize it to your own needs with ease.

Because of this open behavior of both Pi and AdaFruit you get some fantastic remixes and combinations of hardware.  This kind of low cost, easy access and modification of the platform lets creative people do new and interesting things.  Recently the FUZIX distribution was ported to the pico.  MicroPython and CircuitPython is already ported.  It won't be long and a simple and inexpensive wireless interface will be added to the mix and IOT will be in play.

Anyway I think over the next 2 years you're going to see more and more computing embedded into more devices.  A great example of how the future products can change.  The idea of a smart mirror started with people figuring out LCD monitors and Raspberry Pi's are cheap.  Initially they were hacked together by industrious individuals.  Then the open source projects to make it easier came along.  Today you can get a home gym with a built in smart mirror for workouts. The low cost of the Pi computer made that possible.  The Pico and RP2040 chip is going to do the same thing on a microcontroller level.  

Sunday, January 24, 2021

Circuit Playground BlueFruit LED light strip

I don't tinker as much as I'd like. I usually get distracted surfing the web or playing Civ 6 games. Finally got around to trying to build one of these:

https://learn.adafruit.com/easy-no-solder-bluetooth-controlled-room-lights

Basically take a Circuit Playground Bluefruit - https://www.adafruit.com/product/4333 and a strip of neopixels and you can control them with the adafruit BlueFruit app on your phone.

So it's super easy, requires no soldering (as the project title suggests) and turns out pretty cool.  


Anyway finally got one in.  I burned out one of my bluefruits in the process.  I wired it upside down *AND* used a 12v power supply by mistake.  YIKES!  Smoked it right up.  Going to have to buy another to replace it.  

Side-note the crayon containers from Micheals (or JoAnn or the other craft stores) are fantastic for storing these things (you can see some on my messy desk)

Saturday, January 23, 2021

Photo Challenge week 3 - Black And White


Week three - Take a black and white photo of any subject you want.


I love how vivid the details turn out in this shot when I was just goofing around. 


It's even more interesting when you remove the background - it looks like a drawing.  I need to clean up some spots around the ears, the auto select tool did good, but not perfect. 


So now I just need to try this again, but next time I want to try a person and get one of those black and white portrait photos that show details like skin tone.  Like the cover shot in this article: https://iso.500px.com/35-fantastic-black-and-white-portraits-on-500px/

So this catches me back up - next week is 'Warmth' - not sure what I'm going to do yet.