Showing posts with label Gadgets. Show all posts

Monday, November 1, 2021

3d printing a Raspberry Pi "laptop" case

 I had some Pi-3's laying around so I thought I'd try to make one of these from the Adafruit learn program: 

https://learn.adafruit.com/mini-raspberry-pi-handheld-notebook-palmtop

The parts list from the Adafruit site:


The funny thing is this list doesn't include the audio amplifier you need later in the guide.  Oh well.  


The STL's printed from my PrusaMini as is.  Getting software working and parts connected turned out to pretty easy.  Not simple mind you, but if you follow the steps, it goes pretty well.


The screw holes aren't sized very well, they're a bit too big. - I used my 3d former pen to fill in the holes and then drilled them to the right size.


Took a few tries to get the adafruit software to work the way I wanted it to, but eventually

sudo python3 adafruit-pitft.py --display=35r --rotation=270 --install-type=fbcp

was the trick to get the screen right side up. 


But it works pretty well.  Takes a while to get used to typing on the small screen.  I don't think I have the eye sight needed to run the gui so I won't even try but it's a nifty little toy.

Wednesday, September 15, 2021

Kitty Paw toe bean macro pad

 I'm catching up on my tinkering projects.  The latest one: Kitty Toe Bean Keypad with Color TFT.  I forgot to take in-progress pictures but here's the final just before assembly shots.  I 3d printed the parts on my Prusa Mini and they came out excellent. Only some minor looseness in the snap-together parts.  The rest of the parts I ordered from Adafruit.com listed in the build guide. 


Pretty happy with how the qtPy soldering turned out


The Kahil Jade switch wiring isn't great, but it works - you have to solder to a pin/post which requires very steady hands to keep it smooth - I do not have steady hands.


Press fit together.  You can see some of my sloppy soldering on the TFT display.


With the Toe Beans installed.


Here's a video of it in action - the original build guild has a dancing parrot as the image, I swapped out pictures of my cat Lola.  Sorry about the vertical filming I wasn't paying attention. 


All in all a fun project - the buttons do CMD+S (save), CMD+X (cut), CMD+C (copy) and CMD+P (paste).  I'll have to open a thread in the adafruit forums as the overall performance is really slow.  I have to hold the button longer than I would expect for it to take the action.  In the video on the build guide you get the impression that it works much faster/smoother than that.  Probably a wiring issue on my part


Monday, July 19, 2021

printing with PETG in my Prusa Mini


So I bought a low-cost spool of OVERTURE 3D PETG from amazon - it was on sale for $21, so I went for it.  First off, Overture's packaging was good and came with a 20cm x 20cm build surface sticker.  It's too big for the mini, but might come in handy with my MonoPrice printer at the office.  It also came with an overture branded ruler/card type thing that's making a nice bookmark in my Foundation and Empire book.  Trying to read them before the series drops on AppleTV+, but I digress. 

My first print was a small tilt box I found on Thingverse.  It came out really well!


It also came off the bed with out any issue (more on that in a few).  

Next up I wanted to print some buckles that would work with some web strapping I have around the house from a previous halloween costume build.  There were a few out there, but this one on the Prusa Prints gallery was the one I went with.  I printed it twice, with supports both times.  Not sure if I needed them or not, but it looked like some of the spans might be too big to cover with out supports.  They came out great and work pretty well.  I left the straps extra long so I can tie a knot if the buckle fails on me just in case.


The only issue I had was taking the brim and support material off the standard prusa mini bed.  It was stuck on like superglue.  I almost scratched the bed trying to get the excess off.  It took some searching to figure out what was different.  In the tilt box case, I let it run over night and took it off the build plate the next morning.  With the buckles, I was printing them back to back and trying to remove them without letting everything become truly cold.  In the various forums I see all kinds of tips and tricks - glue stick, windex, other release agent kind of stuff.   Then I decided to see what the manual said.  Should have started there in hindsight. 

Heatbed: Various manufacturers suggest using various separation (or adhesive) layers for printing PETG, such as Kapton tape, glue stick, etc. Our print sheets work fine without these separation layers but it’s important to know a few basic rules. First, keep the print surface clean. When printing on a smooth sheet, use a window cleaner instead of isopropyl alcohol. Textured powder-coated sheets can be cleaned with IPA. Once you finish printing, let the print cool before you try to remove it from the sheet. 

And there it is. Let it cool completely before removing.  I will probably try using windex to clean the bed next time instead of the alcohol wipes, but other than that, patients will be my go-to move.

Tuesday, March 9, 2021

Got a new 3d printer

So I have a Monoprice Maker Select 3D Printer , which is a clone or re-market of a WanHao Duplicator i3 and have had a generally poor experience with it.  It's 75% on me, to be clear.  I knew it required tinkering and tweaking when I bought it.  I thought I was up to the task, but it turns out I'm not. Mostly due to the time commitment required up front.  That's where I came up short.  I have difficulty putting together the extended blocks of time I would need to make this very capable printer do what I'm looking for. 

prusa box

So I went out and bought myself a Prusa Mini+ (and a spool of  Prusament PLA Prusa Galaxy Black).  I wanted a printer that had a great reputation for easy to use and a large community.  I also wanted something relatively small footprint wise.  Lastly I was factoring price in the overall equation.  

The experience so far has been remarkable.  I had to order it 6 weeks in advance, the demand is so high that you can't really get it immediately.  The shipping from Prague, Czech Republic was amazing.  I received a tracking number Wednesday afternoon (after close local time) and had my printer Friday afternoon.  That includes clearing customs.  Amazing. 

configuration


It was pretty easy to set up and get working. The calibration and configuration is very easy and simple to follow.   I was up in printing in under 2 hours.  Could have been faster had I bothered to read the instructions before I started. The way they handle setting the z-height is amazing.  the auto-bed leveling is also automatic, which is my biggest issue with my old printer.


I printed a new set of knobs for my toaster from thingverse which worked out pretty good so far.


I also printed a support for my Dremel 4000 which is going to come very handy for polishing future prints.

Han Solo blaster receiver


Now I'm starting to print out the parts for a Han Solo blaster for a future costume I intend to build.  I didn't do a good job researching this. I've found alternate and perhaps better builds but this one is what I started with and I'm kind of committed to this.

Sunday, January 24, 2021

Circuit Playground BlueFruit LED light strip

I don't tinker as much as I'd like. I usually get distracted surfing the web or playing Civ 6 games. Finally got around to trying to build one of these:

https://learn.adafruit.com/easy-no-solder-bluetooth-controlled-room-lights

Basically take a Circuit Playground Bluefruit - https://www.adafruit.com/product/4333 and a strip of neopixels and you can control them with the adafruit BlueFruit app on your phone.

So it's super easy, requires no soldering (as the project title suggests) and turns out pretty cool.  


Anyway finally got one in.  I burned out one of my bluefruits in the process.  I wired it upside down *AND* used a 12v power supply by mistake.  YIKES!  Smoked it right up.  Going to have to buy another to replace it.  

Side-note the crayon containers from Micheals (or JoAnn or the other craft stores) are fantastic for storing these things (you can see some on my messy desk)

Monday, January 25, 2016

Snowzilla timelaps

So we got some snow here.  The forecast projected it's arrival with pretty good accuracy.  Since I had the advance warning, I set up a system to do a time lapse of it.

First thing was to find a camera that could run for 48 hours or more. Looking through my bin of parts and found my old iPhone 4s.  Took a while to get it running 9.2 (not sure that was a wise choice).  This version of iOS is pretty sluggish on an older iPhone.  There's something to the class action lawsuit being filed.

Next up, I needed to find an app to take the photos.  Luckily there's no shortage of apps in the app store to do this. The app Lapse It was free, and well reviewed. So I got it installed and it was amazingly easy to use.


Tap on New Capture:


I tapped on the timer and set it to take a photo every 15 minutes.


I took the defaults for everything else.  You can only do 480p in the free version, to upgrade to 720p or 1080p you have to purchase the pro version.  A fair tradeoff.   Next I had to position the camera.  I went low-tech:


Anyway, the end result:


It turned out pretty good.

Tuesday, September 8, 2015

Locked out of my August smart lock (sorta)

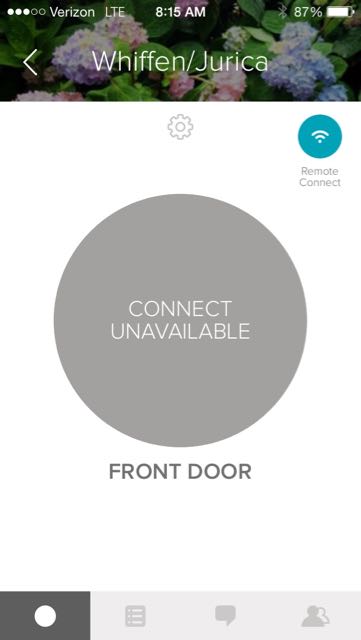
A deliberately salacious headline.  So this morning I had this sneaking suspicion that I forgot to lock the door.  No problem!  I bought a smart lock just to solve this problem!  Open the app, click the wifi button and this is what I see.


GAH! the wifi connect has failed again!  Commute back home from work and sure enough, the red light is blinking.  This is the 3rd time the remote connect has let me down.  It's to the point now where I don't trust it and almost wish I'd never gotten it.

The app needs an upgrade.  It should give me a warning when the WiFI can't phone home.  It should also restart itself if it can't phone home after X hours, where X is a configurable number.  I've sent my suggestions via their support channel, we'll see what they say.

Overall, I'm not as happy as I could be with this setup.  When it works, it's brilliant, but the large size of the nob, the cover falling off when smaller hands try to turn it and now with the issues with the wifi connect cropping up it's harder and harder to recommend this.

Friday, July 24, 2015

Lost another Withings Pulse...

So I lost another Withings Pulse the other day.

It was my forth Pulse over all, and is the second one I lost.

I lost my first one by attaching it to the key pocket on my 5-pocket jeans rather than the waste band.  I did it because I hadn't put my belt on yet.  Proceeded to put my belt on but failed to move it for some reason.  It was Tuesday, election day.  I went in to vote and somewhere on my commute to work, realized I had lost it.  This will become a recurring problem with me.  I wear the thing on my right side, and the seatbelt can knock it loose.

The second one had technical problems and Withins Support was awesome about it and replaced it after a bit of back and forth with them, even though I had bought it second hand.  Top marks to Withings customer support (I have contacted them about other things too, and they did well in those cases also).

The third one went into the ocean with me.  It still works as a pedometer, but the O2 and pulse features are shot and the battery only lasts 4 hours.  Salt water is very hard on electronics as you might have guessed.  I thought it was completely fried, but after drying it out and leaving it for 24 hours, then fully charging it, it came back to life, albeit with limited functionality.

The forth one simply popped out of it's rubber holder, again while getting out of my car I suspect. I had been very lucky with this one.  It went into the pool with me once.  The rubber cover kept it dry enough and it suffered no ill effects.  I had lost it before in a similar fashion, but retracing my steps I always found it.  I retraced my steps this time but it didn't turn up. I suspect someone else found it or I didn't loose it where I parked my car.

So now I'm using my phone to measure my steps which turns out to work ok, since I take my phone with me most places.  I think it might be a little generous with the step counts however.  I'm debating on getting another one.  Going to have to put a saved search on ebay and craigslist.  Maybe if I can score one cheap enough I'll do it again.  I need to find a use for all these Pulse accessories I have...

Saturday, July 27, 2013

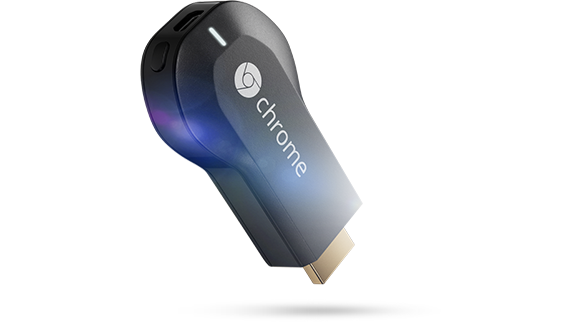
Ordered a ChromeCast

I, like a lot of gadget obsessed people, was intrigued by the google announcement of their ChromeCast device. It will probably upset most of the content providers to the point that they will put restrictions on it (I agree with Mr Kafka's assessment of what content providers reactions are going to be).

Not going to re-hash it hear other than to say it plugs into your TV's HDMI port and then allows you to display stuff from your Google device (tablet, phone, chromebook, etc) onto the TV. It has an amazing price point: $35. It will eventually work with all Google Android and HTML5 based apps.

It's basically going to be Google's 3rd attempt at getting mobile and web content onto the TV. First there was Google TV which didn't take off. It was cool, but not cool enough. It's still around, but it's kind of an afterthought since most smart TV's already do what it did for you. Next came the Nexus Q which was another flop. So much so that the google play service doesn't even work with it anymore. Now we have the ChromeCast.

The initial user reports coming in are all overwhelmingly positive, but they were pretty positive for the first two attempts too. Here's why I think it's going to be a hit: Price point. It's so cheap people will buy one even if they're not 100% sure they'll use it. There are a truckload more android phones out there than before. It's very simple, no wires, adapters or power cords.

Apple has it's version of this technology called AirPlay, which as been around for a while. It didn't get a whole lot of traction. The ability to stream music from my iMac to my Airport Express was neat, but not the ultimate solution. Then came the AppleTV. Ok, little cooler, now I can play to my TV speakers, both audio and video. Add iPhones to that mix, and it started to take off a lot more. My kids and their friends make videos on the iPad and then instinctively know how to double tap and bring up the output selector and stream their new creation to the TV instead of huddling around the small screen. I also have an iHome W3 portable speaker I recently acquired to play music from my phone, tablet or PC.

Here's one interesting aspect of AirPlay that I don't think Chromcast can match in it's current incarnation. On both my AppleTV and W3 speakers I have control buttons (a remote for the AppleTV, they're built into the W3speaker). If I press those buttons while someone is streaming to the device, the remote presses are sent to the streaming device. So if my phone is in the charger up stairs playing music to the speaker in the kitchen, I can play, pause, volume up/volume down with out having to go to the source device. I think that's missing in the ChromeCast device. How many people have a phone charger on the couch with them so they can keep their phone with them while it's streaming without worrying about battery? The notion of the phone/tablet being the player and the remote is going to present some battery life issues for people who don't charge their phone in the same room as they chromecast. It's still going to sell like crazy though. It's already sold so many that google has stopped the 3 months of free Netflix promotion.


Friday, August 3, 2012

Mountain Vista, er I mean Mountain Lion

So I've been running Mac OS 10.8 'Mountain Lion' for a little over a week now and I am not impressed at all.  Fortunately it's only $20, but So far I have yet to utilize a single new feature in it. Messages plain ol' doesn't work for me.  I still have an @mac.com email address for my apple ID so there is all kinds of no-joy for messages.  I use Outlook for work, so I don't need reminders, and I use Evernote, so Notes is superfluous for me (and rather crappy to boot).   So far this is the Windows Vista of upgrades for me.  It added security, which is annoyingly getting in my face, it seems slower on some things (I get more beach balls than pre-upgrade) and of all the claimed new features, I don't touch most of them.  Yup, it's vista.

Worst part of the upgrade to me is that my trusty old 2007 MacBook Pro isn't supported anymore.  It's had a reasonable run, but it's sad when a still viable device is left behind like this.  Oh well, I guess Apple can't hit it out of the park all the time.

Got back into LightStrike for a day...

We hadn't done much with LightStrike for a few months.  It had pretty much turned into a NERF battleground here instead.  I was modding out my nerf guns with voltage upgrades and upgrade kits from Orange Mod Works.  Then out of nowhere, I hear that familiar sound of a LightStrike Gun turn on from one of the cubes outside my office.  It quickly escalated into an impromptu battle in the office.

While I was on vacation I got an interesting comment posted and a google+ comment.  The post comment from Michael Kröhnert on my first light strike mod post is about replacing some blown capacitors on a non-functional gun, interesting read, check it out if your into the internals of the guns.  And Bernd Kammerer wants to try and make a Light Strike compatible gun. So I'm trying to reply to those today and probably fire up my guns again and start another skirmish.

Tuesday, December 27, 2011

Another simple LightStrike gun Mod

Ok, I've been playing around a little bit more with my  D.C.R.-012. Basically it's turned into my practice gun. I'm trying all my hacks and mods on this LightStrike gun first to learn my mistakes in one sand box as it were. At any rate, this time I decided to put a SPST push-button-style switch in. It turned out great functionally. Turned out horrific visually. First I decided to cut the clipping bracket off the back. I decided to take my new Dremel 4000 out for a spin on this mod, so I used a cutting disk to cut the piece off.

And then used a sanding band disk and buffing paste and felt pad. Lesson learned: Don't do that. Basically the plastic is far too soft to dremel at most speeds. You basically end up melting the plastic. Further I nicked the plastic where the headphone jack goes making it look even worse. Anyway, I finished up the job with a Xacto knife, which is what I should have started with. I cut a notch in each half of the case to fit the round button. Lesson #2, it's pretty hard to get this even, so either cut it out with the gun screwed back together, or put it on one side or the other, not along the lateral line.
I cut the lead going to the weapon select and soldered it to my push button. Interesting note about the capacitance sensing of the guns, they don't look for a specific value, but a delta in that value. If, for instance, you want to take a gator clip and temporarily clip a switch on, you have to do it while the gun is off. Otherwise it interprets the change in capacitance as having the button pressed and it cycles through the weapon settings continuously (which makes sense, I've increased the electron holding capacity of the wire lead. Cutting the copper tape off and putting the button on changed the initial value of the capacitance on startup but that initial value isn't important, it's changes in that value. Ok, here's what I considered the interesting part. The switch itself isn't enough. You have to put a wire lead hanging off the other end of the switch to hit the threshold needed to evoke the change. I tried some simple test and basically I need at least 3 inches of the wire I was using to get it to flip. To ensure it would trip. I used a red piece of solid core wire that's hard to see in my picture, but I basically just coiled it up in the dead space between the trigger housing and reload switch.
The End result, I have a button on the back of the gun that is now weapons select.
So now I can change weapons with one hand. I've got to tidy up the fit and finish a bit, there's gap still where the two halves meet and I cut too much on one side and will need to patch/bondo that back. But it works. I think the next switch I want to add is something like these two switch types:
These are both pictures from the radioshack.com website. The toggle with safety cover would look the coolest, but it's not a SPST. The 2nd switch is a SPST and it's lighted, so presumably you could add some more cool lights to the gun over all with this one. Anyway, we'll see if I actually get around to it. I had also thought it would be cool to have the weapon select button be a rotary switch, but as LYNX pointed out in his comment, rotary switches aren't typically SPST. I guess I could make Cam with a lobe on it to push a SPST button, but that'd be too much effort for me at this point. In the photos above, you can also see my 'learning' attempts with Amaco's Rub 'N Buff product line. I didn't prime the gun first, I simply started smearing it on, and it seemed to work as expected. The copper looks like it will give me the look I want. The silver leaf (not show) didn't work out as well as I had hoped. My local A.C. Moore only had those two colors, but now that I know how they look/work I feel a bit more comfortable about buying them online. I'll probably go for Ruby and Spanish Copper. Most of what I'm figuring out I've learned/read in various NERF gun mod sites and forums.

Still have a lot more practicing to do. It'll be interesting to see if this gun even functions by the time I'm done with it.


Wednesday, October 19, 2011

My first Light Strike Mod and tear down photos

All right! It's light strike mod time! I've decided to hack my  D.C.R.-012 and do some mods to it. After you remove the stickers (which is a little too easy, the adhesive isn't very good) it looks like this:
Gun right
Gun Left
The little copper patches are the 'switches' from the stickers. They are capacitance sensor based, which is neat and disappointing at the same time, because it make putting a real switch there complicated. Anyway, on one side there are a boat load of screws that need to be removed and the orange end-cap on the barrel needs to be taken off (comes off easy). After that, you see something like this:
Inside of Gun
Picture is a bit blurry, but you get the idea.
gun close up
The 'brains' are interesting. Everything is clearly labeled in english for what it does. Things like CAP_SENSOR, LIFE, RELOAD or IR_RX so drastic mods would be pretty easy. The mount points for the attachments seem to be in parallel so they're likely only restricted by the plastic mount shape rather than the actual location. It would be interesting to see what would happen if you grafted a 3rd mount point on. Could you activate the tracker at the same time as the scope and launcher attachments?
gunfront
Looking at the IR blaster (the opaque lens) and receiver (the black circle with the silver X on it)
gunimitter.png
The IR transmitter with the cone and lens removed.


I'm not doing much today, just changing some LED colors. the life bars are 3 red LEDs. Going to make them 3 different colors (well, specifically changing two reds out)
gunleds.png
unscrewed them and soldered in a green and blue that I took out of some of my kids toys (sssshhh, don't tell! They were broken anyway). I would have rather done green -> yellow -> red but none of the toys had any yellow LEDs. I guess I could have gone white and then put a yellow film, but I'm just screwing around so what the heck.
bluegreenred
First off, this Point-and-shoot camera stinks. Second, here's the two new LEDs in place. They're rounded on the top and the originals were flat, so I get a different light distribution in my new LEDs that isn't ideal. But it does work:
gundone
So now when I get hit, I lose blue -> green -> Red health bars. Some future mods I think I might do:

  • Move the on-off switch to where the head phone jack is. The headphone jack location would allow me to turn it on and off one handed while gripping the gun.
  • Try to get a mechanical switch to work with any of the buttons. In particular, weapon select would be neat to make into some kind of rotary or dial type button. A toggle switch for single fire/semi-auto fire, etc.
  • Graft on some 'extra bits' to give the gun more profile relief. I can't for the life of me figure out why they made all these guns so flat. I have some plastic tubing and other ornaments I could put on the sides with some LEDs to spruce up the side profile.
  • Paint job. I've been stalking the Nerf Modding forums looking for tips and pointers for how to paint plastic guns. So far I have a few ideas. I'll probably just go with basic silver and red to match the grip plastics

Next I take apart my scope and rapid fire attachments.

Thursday, October 13, 2011

Decoding the Light Strike ITS

Ok, spent 10 minutes after lunch looking into the ITS signals.

ITS

You'll have to read the previous post about bits, to know what I'm rambling about, but in essence the significant bits were the even bits between 40 and 62. Not all are used, but I haven't tried all the guns and option combinations yet. So the ITS (Intelligent Targeting System) has 3 modes. Sentry mode - you have to hit the target 5 times, each time you hit it, you light up a bar with your team color. Fifth hit turns it into a sentry for your color. It blasts out random shots until it's captured by another team. Bomb Mode - similar, you get 5 hits to activate the bomb, 6th hit to set it off, which spins the device and it emits shots in every direction and makes an explosion sound. Medic Mode - 5 shots to capture again, but now when you shot it a subsequent time, it puts health bars back on your gun.

So if you activate the sentry, the bits that go high (in addition to the team bits) are: 40, 42, 44, 46 and 56 which in my 'bit math' comes out to a strength of 3848, the strongest shot yet. So far, nothing too unusual.

If you activate the Bomb, however, things get interesting. The bits that go high for blue are: 28, 40, 42, 44, 54, 56. Bit 28 is the new rascal. If you do it as Red, bits 28, 30, 40, 42, 44, 54, 56 go high (in addition to the team bits) - both 28 and 30. Yellow is just 30. Green is just 28 again. I was hoping that green would be both 28 and 30 low. That would make bit s28 and 30 a team marking, but it isn't. So why are blue and green the same, while yellow and red are different? A mystery for another day I guess.

Next up, Medic mode… this would be a fun one to clone into a smart remote or other IR blaster device. You could leave a 'stim-pack' like in the video games around the playing field. Medic mode is the most different code thus far. It broadcasts bits 8 and 40 for every team, and then you get a simple 3-bit mapping for the team color with bits 58, 60 and 62. So 58, 60 and 62 are blue, 58 is red, 58 and 62 are yellow and 50 and 60 are green. This is the first use of a bit below 10 and uses a different set of bits to mark color. What would be interesting is if you could send a 40 and 42 along with the rest to see if you get more health back per shot.

If I'm reading things right, it would seem that 2048 is the number to take a health bar on or off. So now I just need to finish writing my code to recognize these different flag values and then start painting the screen the correct color for the flag.


Wednesday, October 5, 2011

More Light Strike attachments and decodes

So Adam bought the G.A.R.-023
gun1refractor.pngscope.png
And two accessories, the scope and the refractor launch system.
rapidfireits
I went and bought the same scope and the rapid fire system. I also got the ITS - Intelligent Targeting System. So we now have every offensive add-on (missing the detector, but that's passive/defensive so we can go on with out it). With these attachments you get an Optic strike and Refractor strike with the scope and a launcher strike with the RLS and Rapid Fire with the RFS. The RLS and RFS strikes are actually two things, a distinct IR code and three consecutive hits. So now I have decoded these light strike mods and their data bits.
If you recall, the bits in play are: bit 40, bit 42, bit 44, bit 46, bit 50, bit 56, bit 58, bit 60, bit 62. We now get to add bit 54 and bit 46 to the mix.
High bits for Optic strike: 40, 44, 56, 58
High bits for Refractor: 40, 42, 44, 54, 56
High bits for RFL: 40, 42, 46, 58, 60
High bits for RFS: 40, 42, 60, 62
If you make that a 12-bit binary, you get:
Optic: 2572
Refractor: 3608
RFL: 3334
RFS: 3075
Making the RFL the device to have it seems. In practice it is deadly too, it takes 2+ bars off your gun per shot, but has a long recycle time. Not sure when I'll get to it, but at some point I'm going to decode the ITS. When you capture the ITS for your team it can then do three things: 1 - Sentry mode, it spins and shoots randomly, only damaging teams of other colors. 2 - Bomb mode, you can activate and detonate a bomb doing massive damage (I'm assuming, haven't set it off yet). 3 - Medic mode, when the capturing team shoots the target, it beams back a health bar. Medic mode will be the most interesting to me. What does it send? Could you program a smart remote to record that signal and then have your own version of a med-pack like in the video games? There are other light strike mods we're thinking of too. A fun one might be to make a trip wire. Set off the sensor and an IR damage flash goes off. Or a death room, a room where you continually take low damage doses. It would be like crossing the lava or nuclear waste areas in Doom or Quake.
We spend 10 minutes or so goofing around with it this morning. First time we actually did some real shooting, and it went awesome. This is going to be really fun! Got an uptick in website traffic this week. Going to have to see what search terms bring you to these posts. Probably light strike hack or light strike hacking. I wonder if I show up for light strike mod at all. Probably will after this post.

Friday, September 30, 2011

Perl code for Light Strike decoding

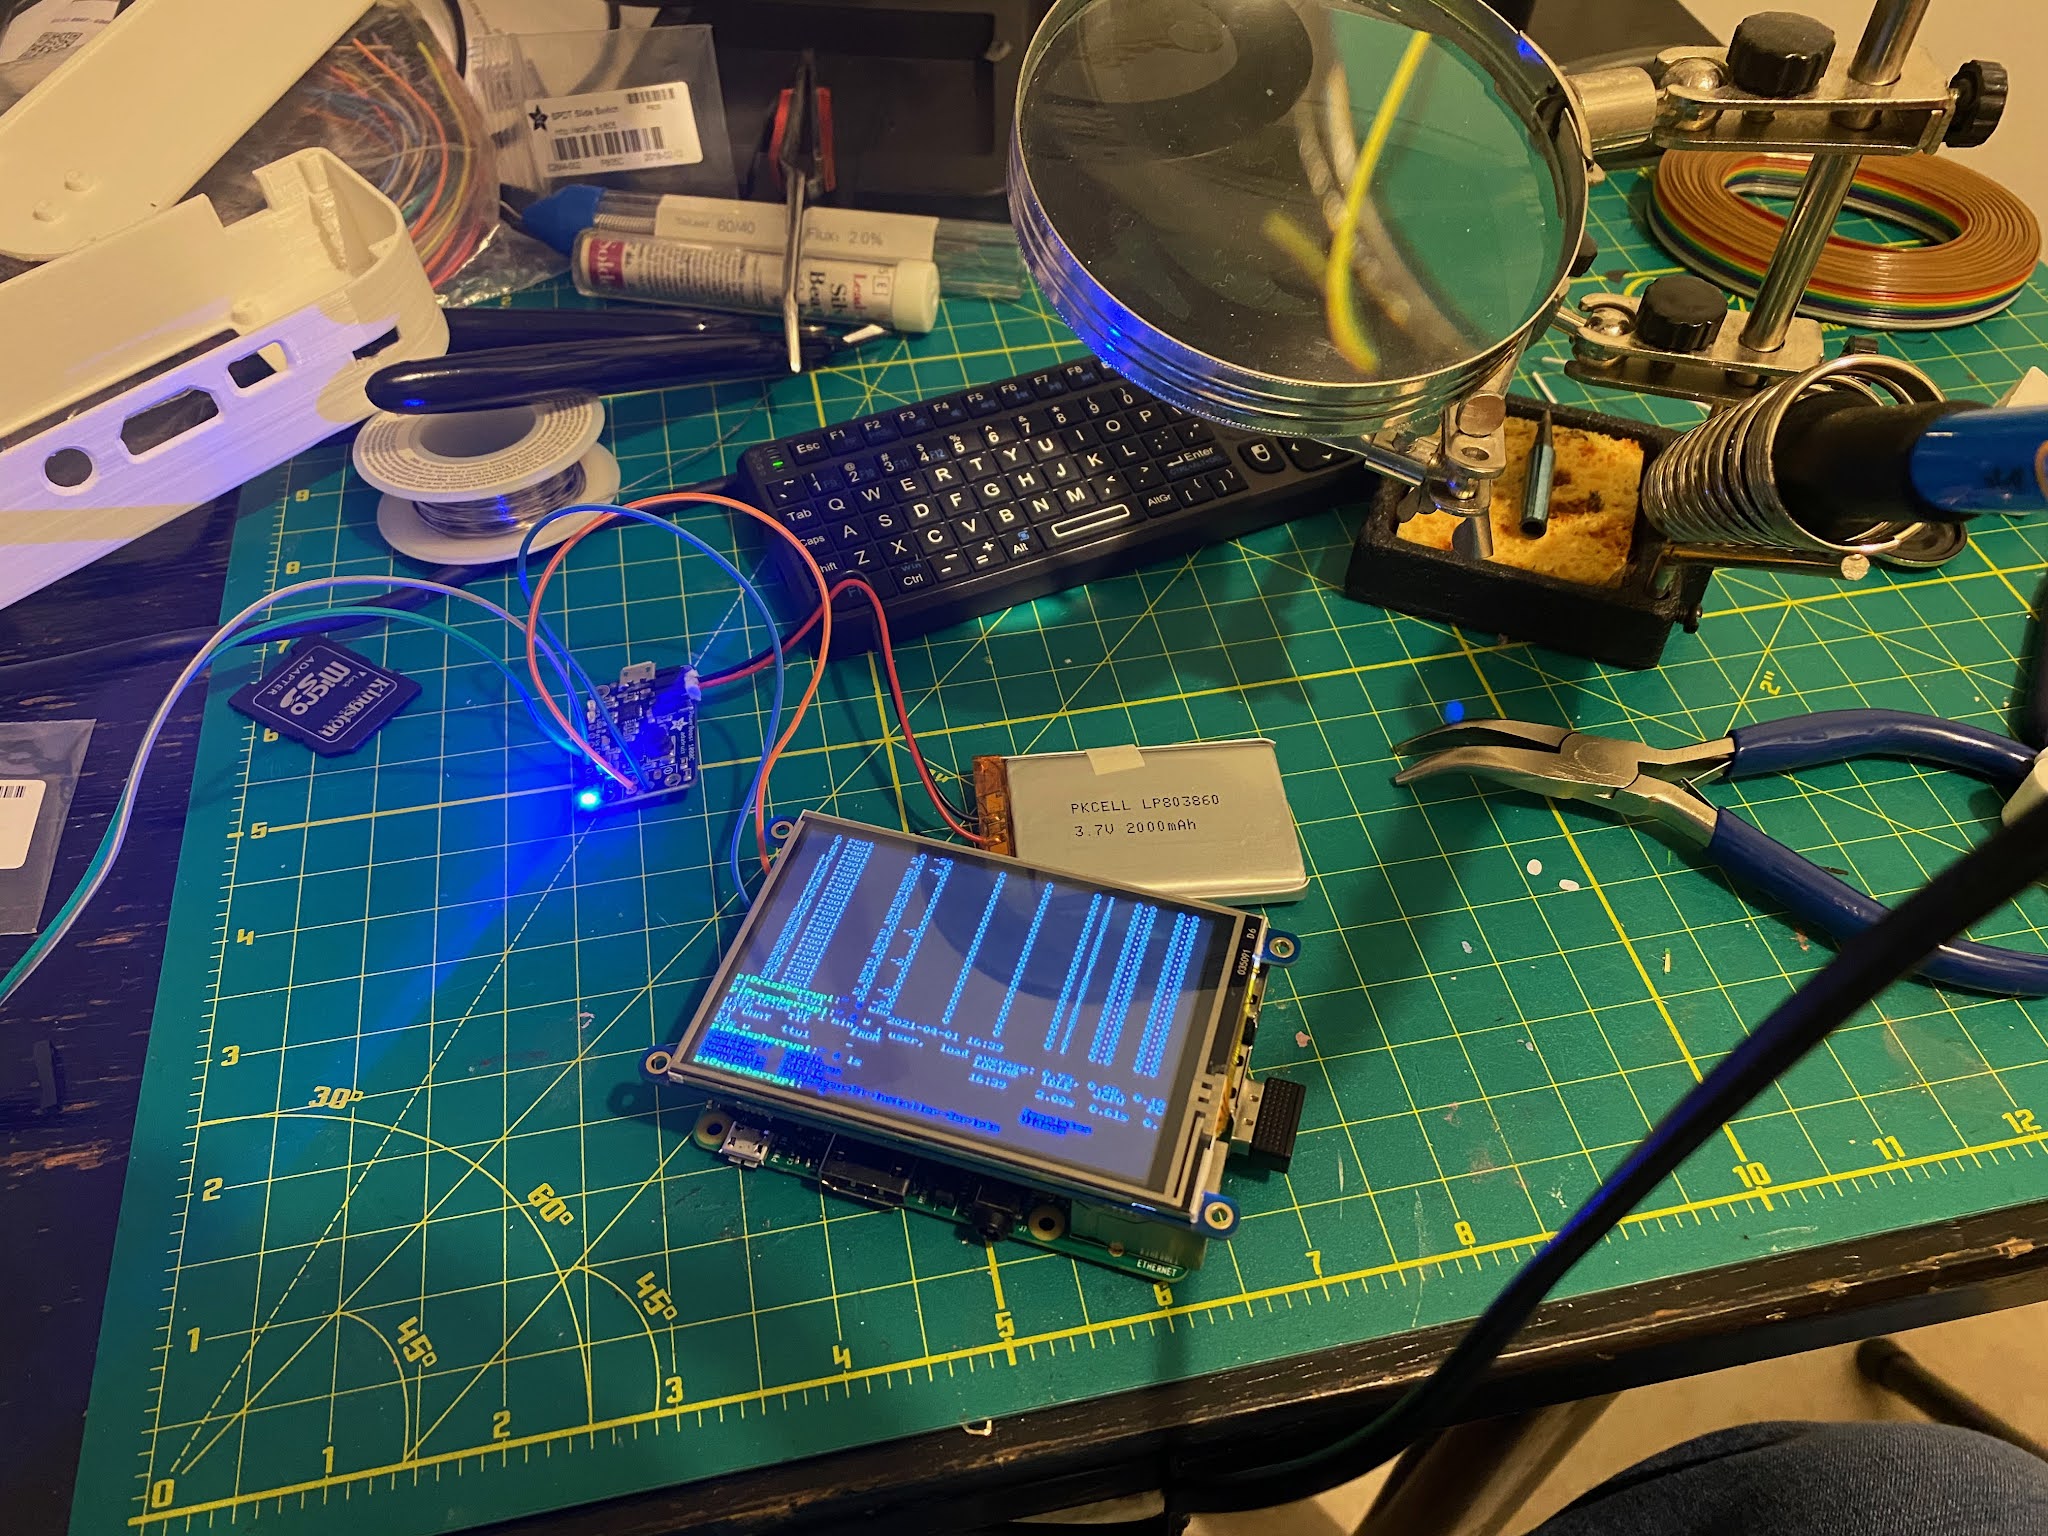
Making progress on my quest to write a 'capture the flag' module for the light strike laser tag guns. Some googling found me this code from Kenneth L. Root. <http://the-b.org>. I hacked it into this the other day and am able to get this output now:


root@rwhiffen-OptiPlex-GX280:/tmp# ./light-strike.pl
Opening port: /dev/ttyUSB0
Opened port /dev/ttyUSB0
Shoot the gun at the IR Sensor
IR Code: 0xe6 0xc2 0x87 0x0d 0x12 0x0e 0x12 0x0e 0x12 0x0e 0x12 0x0e 0x12 0x40 0x12 0x40 0x12 0x40 0x12 0x0e 0x12 0x0e 0x12 0x0e 0x12 0x0e 0x12 0x0e 0x12 0x0e 0x12 0x0e 0x12 0x0e 0x12 0x0e 0x12 0x0e 0x12 0x0e 0x12 0x0e 0x12 0x0e 0x12 0x3f 0x12 0x0e 0x12 0x40 0x12 0x0f 0x11 0x0e 0x12 0x0e 0x12 0x0e 0x12 0x0e 0x12 0x0e 0x12 0x3f 0x12 0x0e 0x12 0xff
root@rwhiffen-OptiPlex-GX280:/tmp# ./light-strike.pl
Opening port: /dev/ttyUSB0
Opened port /dev/ttyUSB0
Shoot the gun at the IR Sensor
IR Code: 0xb9 0xc2 0x86 0x0e 0x11 0x0f 0x11 0x0f 0x11 0x0e 0x12 0x0e 0x12 0x40 0x12 0x3f 0x12 0x40 0x12 0x0e 0x12 0x0f 0x11 0x0e 0x11 0x0f 0x11 0x0e 0x12 0x0e 0x11 0x0e 0x12 0x0e 0x11 0x0e 0x12 0x0e 0x12 0x0f 0x11 0x0e 0x12 0x0e 0x12 0x40 0x12 0x0e 0x12 0x3f 0x12 0x0e 0x12 0x0e 0x12 0x0f 0x11 0x0e 0x12 0x0e 0x12 0x0e 0x12 0x40 0x12 0x0e 0x12 0xff
root@rwhiffen-OptiPlex-GX280:/tmp#


So I'm getting closer. The results are more inconsistent with the perl code than with the 'mode2 command, which makes me think I might want to do some 'expect' style perl coding with the app rather than direct. maybe something like:


open(MODE,"|mode2 --driver=usb_uirt_raw --device=/dev/ttyUSB0 --mode");


And then do all my interacting with the output via the MODE file handle. That would allow me to get some basic functionality going.


Wednesday, September 28, 2011

Light Strike IR decoding part 2

The continuing saga of my efforts to hack a light strike laser tag system by reading the infrared signals it puts out…

Ok so I just went from being totally stuck and posting that blog post, to being unstuck in about 30 minutes. Ok, so in the last post, I was thinking I needed to figure out what the bit encoding was for the pulses coming in. WHen you look at the in a long row, it's hard to see the patterns. So I was reading the man page for mode2, and it says there's another command line switch called --mode, which is helpfully described as " enable alternative display mode". Ok, what could it hurt right? So I ran it. Instead of getting the two column pulse/space list, you get a more helpful:


6700     650      900      700      900      700
900      700      900      700      900     3150
900     3150      900     3150      900      750
850      750      850      700      900      700
900      700      850      700      900      700
850      750      850      700      900      700
900      700      900      700      850      750
900     3200      850      700      900     3150
900      700      850      700      900      700
850      700      900      700      900      700
900     3200      900      700      900  1382500


Which is a lot easier to read, and makes deltas between two different settings stand out. That one was a blue, this one is a red.


6700     650      900      700      900      700
900      700      900      700      900     3150
900      700      900      700      900      700
900      700      900      700      900      700
900      700      900      700      900      700
900      700      900      700      900      700
900      700      900      700      900      700
900     3150      900      700      900     3150
900      700      900      700      900      700
900      700      900      700      900      700
900     3150      900      700      900  2267300


Notice how C2 R3 and C4 R3 change from 3150 to 700? That pattern holds for yellow and green as well. You end up with a pretty simple table:


If you count the spaces as clock ticks and the pulses as 'bits' you can then start to map things out. The last huge number in C6 R11 is the time between the last event and the next event. The last event recorded does not have this value, it is blank and can be discarded. The first pulse is a 'double-high' value which marks the beginning of a frame. This gives you effectively 32 bits. Now I just have to get a perl or python script to read the device instead of the 'mode2' command and I'm off to the races. That will have to wait for another day however, because I need to get back to work.

Light Strike laser tag

After reading a review on Ars Technica: Lawn warfare: Light Strike brings laser tag back home I decided I had to have some of these at the office. They're pretty cool, mostly gimmicks but they do work. I bought myself a D.C.R.-012. Am probably going to pick up some of the accessories as well. I've talked some co-workers into buying them, so we're almost ready to have some office warfare.

dcr-icon

The trick is, you can only 'death match' each other for so long. And most of the that would be on the honor system, since you can self-respawn quickly. So I've set out to try and make my own 'targets' or flags to play capture the flag with. I have some USB-UIRT devices. I found some Linux drivers at LIRC.org and a CPAN perl module for the driver. So far, so good. I'm able to detect gun output by running:

mode2 --driver=uirt2_raw --device=/dev/ttyUSB0

From the command line. It gives me output like this:

pulse 6650
space 750
pulse 850
space 750
pulse 850
space 750
pulse 850
space 750
pulse 850
space 750
pulse 850
space 3200
pulse 850
space 3200
pulse 850
space 3200
pulse 850
space 750
pulse 850
space 750
pulse 850
space 750
pulse 850
space 750
pulse 850
space 750
pulse 850
space 750
pulse 850
space 750
pulse 850
space 750
pulse 850
space 750
pulse 850
space 700
pulse 850
space 700
pulse 850
space 700
pulse 850
space 750
pulse 850
space 3200
pulse 850
space 700
pulse 850
space 3200
pulse 850
space 750
pulse 850
space 750
pulse 850
space 750
pulse 850
space 700
pulse 850
space 750
pulse 850
space 700
pulse 850
space 3200
pulse 850
space 750
pulse 850

Unfortunately subsequent firings do not give me identical values. Some times the pulses are 50 higher, so 6700 rather than 850. Perhaps worse still, the other three colors (that was a 'blue team' laser) seem to have the same values. Next I'm going to plug it into a windows machine and run Girder on it and see what that gives me.

Google wasn't very helpful, perhaps because Light Strike isn't a unique term to the laser tag guns. It's used in other contexts as well. So I think I'll pads this post with light strike hacking and other google-able terms. Light Strike IR hacking is a good example of what I was hoping to find a post about. ANyway, hopefully someone who is searching for linux IR hacking light strike guns will find me and we can team up.

Tuesday, September 14, 2010

Need some new fitness gadgets...

So I have a GPS on my bike, an older 12-channel eTrex. It has it's problems. It looses signal too often in the city so my stats are off a bit (I've was at an elevation of -5 feet) for a mile or so today. So I'm looking for new gadgets to use for this.


So far I've come across the ANT+ system by Digifit and I think it does exactly what I want. Since I use my iPod when I ride anyway, it's one less gadget to carry around. Amazon sells it for ~$80. Since ANT+ is a relatively open system, there's multiple vendors making gear for it:


  • Adidas sensors and devices (ANT+)


  • CycleOps sensors and devices (ANT+)


  • Garmin sensors and devices (ANT+)


  • Quarq sensors and devices (ANT+)


  • Spinning® / StarTrac


  • Tanita weight scales (ANT+)


  • Timex sensors and devices (ANT+)


  • Wahoo sensors and devices (ANT+)


Plus a host of others. So I can add a Garmin speed sensor and a heart rate monitor. If I go to the gym I can get the info from the StarTrac treadmills. Not sure I'll go as far as the Tanita scales though.